Add-In Asistencia en carretera Guía del usuario
User Guide
0 mins to read
Aprenda a instalar y configurar el Add-In Roadside en MyGeotab. Esta solución permite a los equipos de gestión de flotas solicitar ayuda para un vehículo de la flota que sufra una avería u otro tipo de problema en la carretera.
Guía del usuario
Última actualización: Octubre del 2023
Tabla de contenidos
Introducción
El Add-In Asistencia en carretera es una solución sencilla para solicitar ayuda cuando un vehículo de una flota experimenta un problema mecánico o cualquier otro tipo de problema en carretera. Después de solicitar ayuda en carretera, el Add-In mostrará la información de la posición del vehículo de servicio en vivo a medida que se aproxima a la ubicación del vehículo en problemas.
El Add-In Asistencia en carretera de MyGeotab está diseñado para ayudar a los despachadores a crear de forma rápida solicitudes de servicio en nombre de los conductores de su flota.
Los conductores también pueden utilizar el Add-In Asistencia en carretera en Geotab Drive para obtener ayuda enviada directamente a la ubicación de su vehículo.
✱ NOTA: El Add-In Asistencia en carretera solo está disponible para clientes en Canadá y Estados Unidos. Los dispositivos con el plan GO o ProPlus son elegibles para una prueba gratuita de un año, que vence a finales del 2025. Los dispositivos con los planes Base, Regulatory y Pro estarán activados en una modalidad de pago por evento. Si actualiza su dispositivo al plan GO, este se inscribirá en la prueba. Consulte Servicios y condiciones para obtener más detalles.
Servicios y condiciones
El programa Asistencia en carretera ofrece varios servicios gratuitos en carretera mediante una asociación con Agero. Estos servicios están reservados exclusivamente para los vehículos de carga ligera que califiquen, y están sujetos a las siguientes condiciones.
Los servicios de remolque para vehículos ligeros superiores a 25 millas (para Estados Unidos) o 40 km (para Canadá) y todos los servicios para vehículos ligeros (en los planes Base, Regulatory o Pro), medianos y pesados están disponibles por una tarifa adicional. Dentro del Add-In, se proporciona una estimación de la tarifa. Una vez que envíe una solicitud de servicio en carretera a través del Add-In, un representante de soporte al cliente de Agero se comunicará con el contacto de pago designado por el solicitante del servicio para recopilar la información de la tarjeta de crédito o débito por teléfono. También puede proporcionar una autorización de pago en línea para los gastos que usted debe asumir.
✱ NOTA: Como regla general, un vehículo de carga ligera es cualquier vehículo motorizado con una Clasificación de peso bruto del vehículo (GVWR, por sus siglas en inglés) de 10.000 libras (4.535 kg) o menos, un vehículo de carga mediana es cualquier vehículo motorizado con una GVWR de entre 10.001 (4.536 kg) y 26.000 libras (11.793 kg), y un vehículo de carga pesada es cualquier vehículo motorizado con una GVWR superior a 26.000 libras (11.793 kg).
Servicio | Condiciones de |
Grúa | Gratis en un radio de 40 kilómetros (25 millas en los Estados Unidos) desde el punto de recolección hasta el destino. El remolque de vehículos accidentados no está cubierto. |
Cambio de neumáticos desinflados | Un cambio de neumático por llamada de servicio. Más de un neumático desinflado requerirá que el vehículo se remolque a una ubicación de servicio. El arreglo o parchado del neumático desinflado no está incluido. El proveedor de servicios utilizará el neumático de repuesto del vehículo; si el vehículo no tiene un repuesto o si esta no se encuentra en condiciones de utilizarse, el prestador de servicios inflará el neumático desinflado, si el operador de la grúa tiene consigo una bomba de aire, o remolcará el vehículo. |
Servicio de apertura del vehículo con las llaves adentro | El vehículo debe encontrarse en una ubicación accesible. No incluye el costo de las llaves, las piezas o la mano de obra adicional más allá de permitir el acceso al vehículo. |
Recarga de batería | Los vehículos híbridos y eléctricos no están incluidos. |
Entrega de combustible | Esto cubre la entrega de aproximadamente siete litros (dos galones) de combustible. Si se necesita más combustible, el vehículo se remolcará y quedará sujeto a las condiciones del servicio de grúa. |
Uso de cabrestante | El vehículo debe encontrarse en una ubicación accesible y a un máximo de 3 metros (10 pies) de un camino en buen estado. |
Instalación del Add-In Asistencia en carretera
Para instalar el Add-In Asistencia en carretera en MyGeotab debe seguir los siguientes pasos:
- En el menú principal, vaya a Marketplace.
- Busque Asistencia en carretera en Marketplace.
- Seleccione Asistencia en carretera y haga clic en Add to Cart (Añadir al carro).
- Haga clic en Continue (Continuar).
- Revise el Acuerdo de licencia de usuario final, seleccione Accept (Aceptar) y, luego, haga clic en Continue (Continuar).
- Asistencia en carretera se agregará automáticamente a su base de datos y aparecerá en el menú de la izquierda de MyGeotab.
Edición de autorizaciones de seguridad
Puede configurar el acceso a Asistencia en carretera a través de la página Autorizaciones de seguridad. Si quiere personalizar la facilidad de uso de Asistencia en carretera para los usuarios, siga estos pasos:
- En el menú principal, vaya a Personas > Autorizaciones.
- Seleccione el tipo de autorización de usuario para abrir la página Editar autorización de seguridad. Los tipos de autorización por defecto que puede seleccionar son los siguientes:
● Administrador
● Supervisor
● Usuario por defecto
● Usuario de la aplicación Drive
● Solo ver
● Nada
✱ NOTA: Puede crear tipos de subautorizaciones con configuración personalizada.
- En la página Editar autorización de seguridad, escriba “carretera” en el campo Buscar función. Aparecerán tres funciones:
- Administrar solicitudes del servicio Roadside. Si está activada, proporciona al usuario acceso a todas las funciones del Add-In.
- Ver el Add-In “Asistencia en carretera”. Si está activada, hace que el Add-In Asistencia en carretera sea visible en el menú de navegación. Si está desactivada, el Add-In ya no aparecerá en el menú de navegación y el usuario no podrá accederlo.
✱ NOTA: Si esta opción está desactivada, el usuario no puede utilizar el Add-In en absoluto, por lo que la configuración de administrar o ver las solicitudes del servicio Roadside no serán importantes.
- Ver solicitudes del servicio Roadside. Si está activada, permite a los usuarios solo ver solicitudes, buscar, filtrar y exportar solicitudes de servicio seleccionadas a un archivo CSV, dentro del Add-In Asistencia en carretera y la base de datos. El usuario no podrá enviar una nueva solicitud, actualizar las preferencias (como las ubicaciones para la grúa) ni autorizar solicitudes y pagos en curso.
- Seleccione el acceso a las funciones que desea que tenga el usuario. El cuadro con una x roja indica que el usuario no tiene acceso a la función. La marca de verificación azul indica que el usuario tiene acceso a la función.
- Cuando haya terminado de realizar cambios en la edición de la autorización de seguridad, haga clic en Guardar para guardar la configuración.
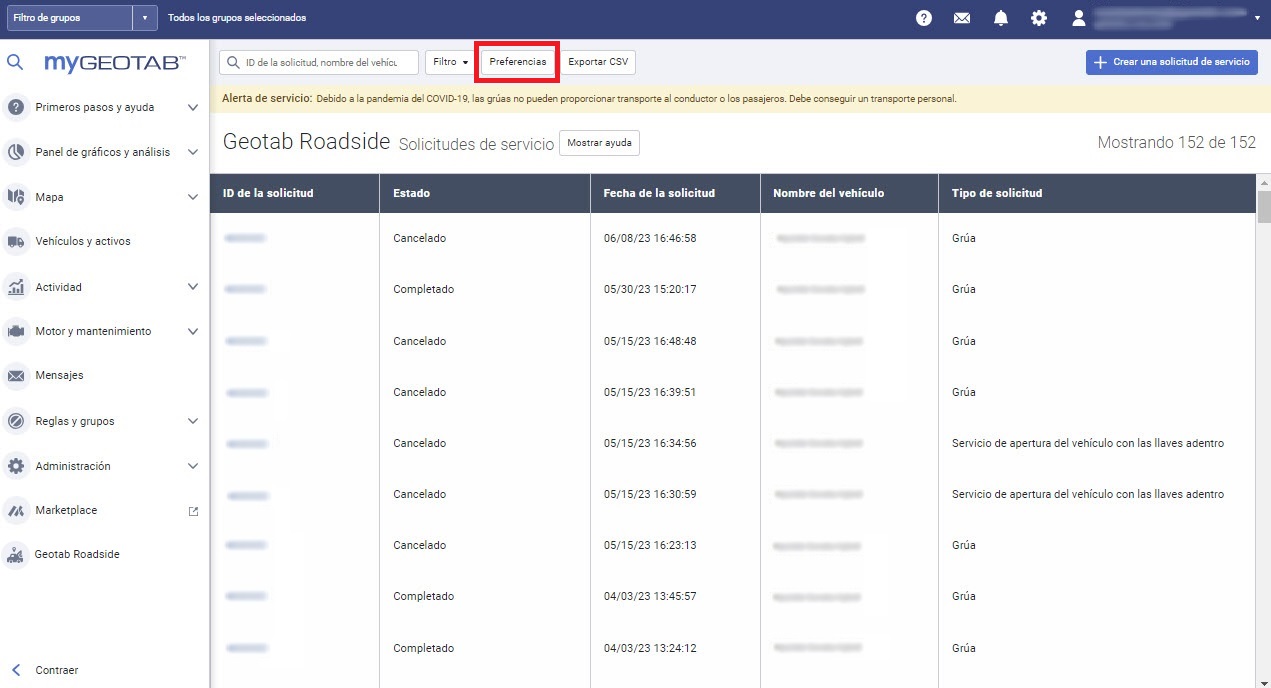
Acceso a las preferencias del Add-In
El administrador de su base de datos de MyGeotab debe ajustar las preferencias del Add-In Asistencia en carretera. Puede acceder a las preferencias yendo a Asistencia en carretera en el menú principal. En la página principal de Asistencia en carretera, haga clic en Preferencias para abrir el cuadro emergente Preferencias.

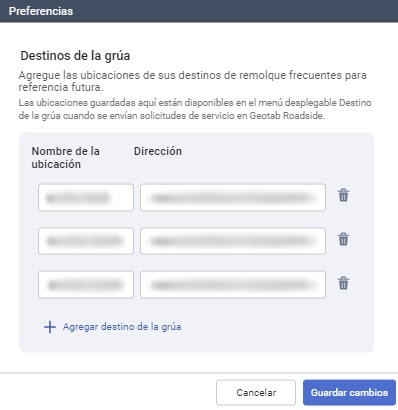
Destinos de la grúa
El administrador puede determinar los destinos preferidos para la grúa mediante la adición de ubicaciones a la lista Destinos de la grúa en el cuadro emergente Preferencias. Cuando se solicita un servicio de grúa, los usuarios pueden elegir entre seleccionar un destino preferido para la grúa de la lista o añadir una nueva dirección en la solicitud. A fin de añadir una ubicación final preferida para la grúa debe seguir los siguientes pasos:
- Haga clic en + Agregar destino de la grúa.
- Ingrese el Nombre de la ubicación y la Dirección.
- Haga clic en Guardar cambios para guardar.
! IMPORTANTE: Después de la actualización del Add-In de Roadside Add-In el 15 de agosto del 2022, los administradores que necesiten datos históricos de solicitudes de servicio en carretera para el período anterior a esa fecha deben comunicarse con el soporte técnico de Geotab haciendo clic en Primeros pasos y ayuda desde el menú principal de MyGeotab y, luego, seleccionar Soporte técnico…, e Información de contacto. Los administradores también tendrán que volver a añadir sus Ubicaciones finales preferidas para la grúa en el Add-In nuevo.
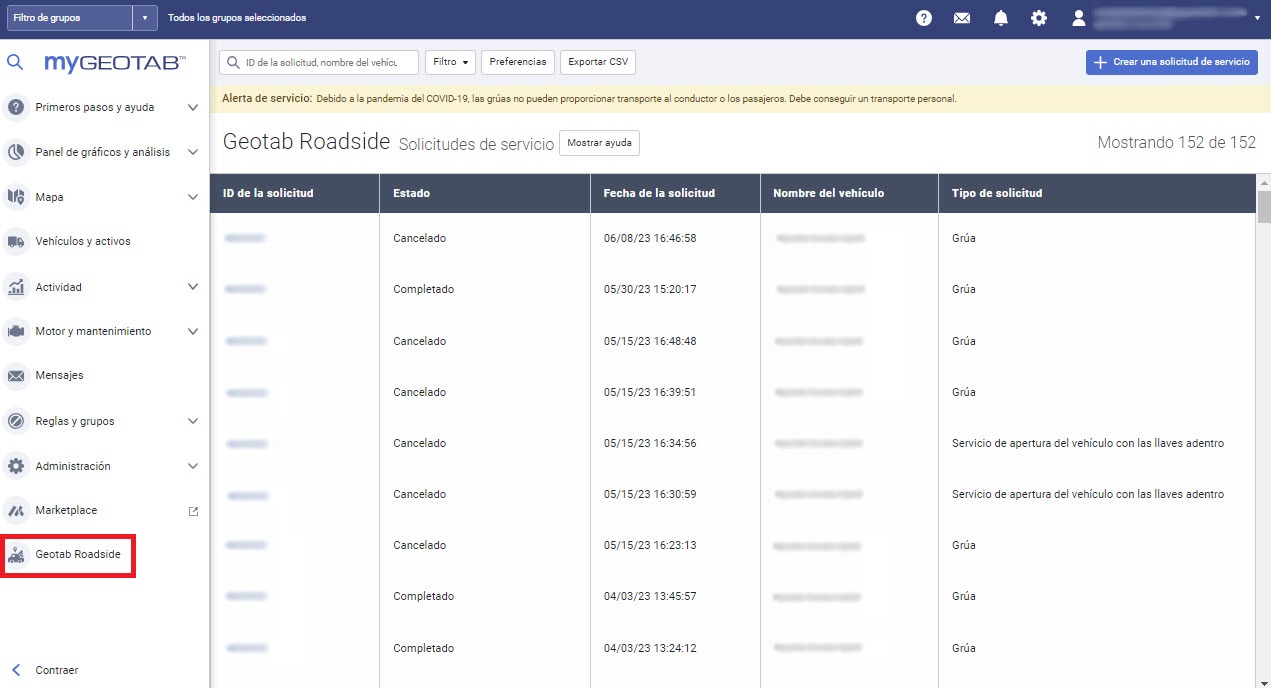
Uso de solicitudes de servicio
En la página Solicitudes de servicio de Asistencia en carretera se muestra una tabla con todas las solicitudes de servicio. Los encabezados de la tabla son los siguientes:
● ID de la solicitud
● Estado
● Fecha de la solicitud
● Nombre del vehículo
● Tipo de solicitud
En la parte superior derecha de la página, puede ver cuántas solicitudes se muestran del total de solicitudes que tiene.
Además, puede exportar un archivo CSV de la tabla de Solicitudes de servicio de Asistencia en carretera mediante el botón Exportar CSV. Se descargará un archivo CSV en su dispositivo. El archivo CSV contiene información detallada sobre las solicitudes de servicio que se pueden ver en la tabla según cualquier filtro o búsqueda que se haya aplicado.

Creación de una solicitud de servicio
Para crear una solicitud de servicio en MyGeotab, haga clic en Crear una solicitud de servicio en la página principal de Asistencia en carretera. Siga estos pasos para completar el formulario en la página Crear una solicitud de servicio.

✱ NOTA: Para crear una solicitud de servicio en la aplicación Drive, seleccione Asistencia en carretera en la aplicación Drive y siga las instrucciones desde el paso 4.
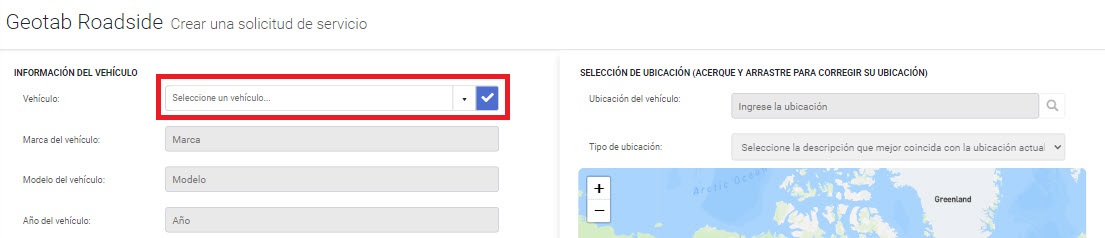
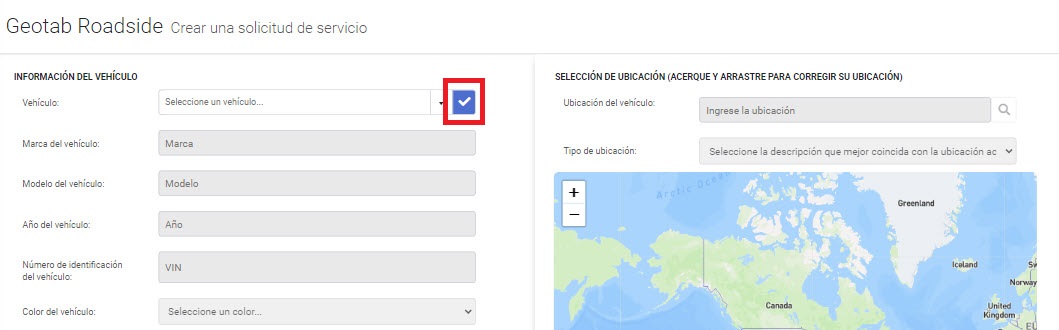
1 | Seleccione un vehículo en el menú desplegable. ✱ NOTA: Actualmente, el servicio de asistencia en carretera solo está disponible en Canadá y Estados Unidos. Si el vehículo seleccionado está fuera de esas regiones, no puede continuar.
| ||||
2 | Haga clic en el ícono de marca de verificación junto al menú desplegable de vehículos para confirmar la selección del vehículo.
| ||||
3 | Si el vehículo seleccionado tiene un conductor asignado, el Add-In completará automáticamente toda la sección de Información del vehículo usando el VIN. Si no hay un VIN disponible para el vehículo seleccionado, deberá ingresar uno manualmente. Debe ingresar el color del vehículo de forma manual. El Add-In guardará esta información para futuras solicitudes de servicio. | ||||
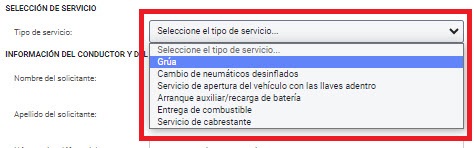
4 | Seleccione el Tipo de servicio de la lista desplegable y responda las preguntas que se muestran después de seleccionarlo. Las preguntas varían según el tipo de servicio. Los tipos de servicio disponibles son los siguientes:
| ||||
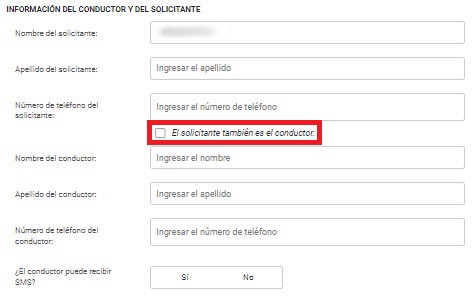
5 | Ingrese la información del solicitante y del conductor. ✱ NOTA: Seleccione la casilla El solicitante también es el conductor para completar automáticamente la información del conductor si es la misma que la del solicitante.
| ||||
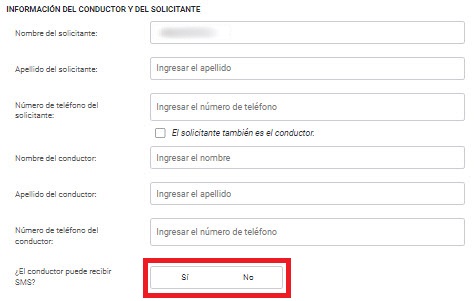
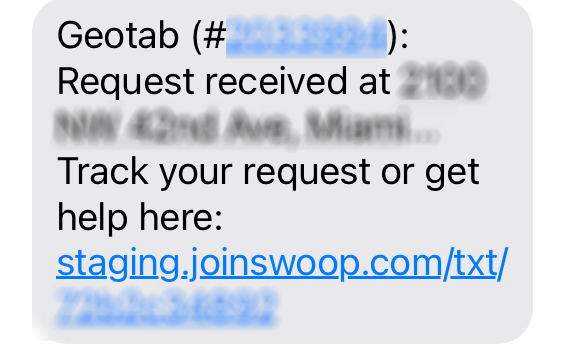
6 | Seleccione Sí o No en el campo ¿El conductor puede recibir SMS? Si selecciona Sí, el conductor recibirá actualizaciones sobre la solicitud mediante SMS.
| ||||
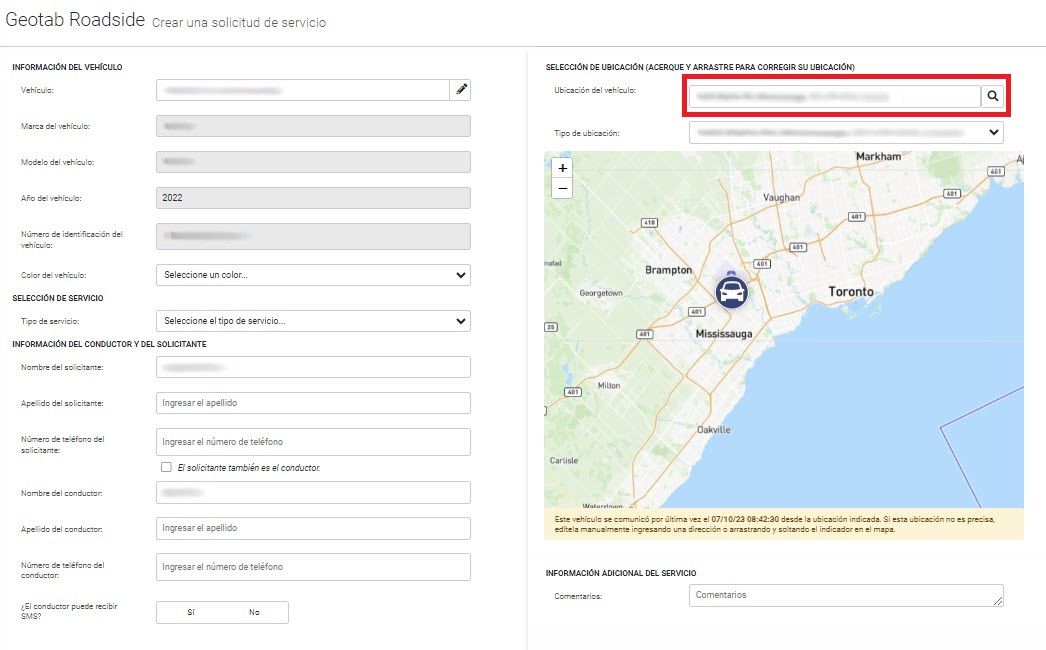
7 | En Ubicación del vehículo, verá la ubicación actual del vehículo seleccionado. Revise la ubicación que se muestra para asegurarse de que sea exacta, porque el proveedor de servicios de asistencia en carretera enviará un vehículo de asistencia a esa ubicación. Si necesita hacer cambios, escriba la dirección correcta y presione el ícono de la lupa.
| ||||
8 | Seleccione un Tipo de ubicación de la lista desplegable. Añada Comentarios si lo desea.
| ||||
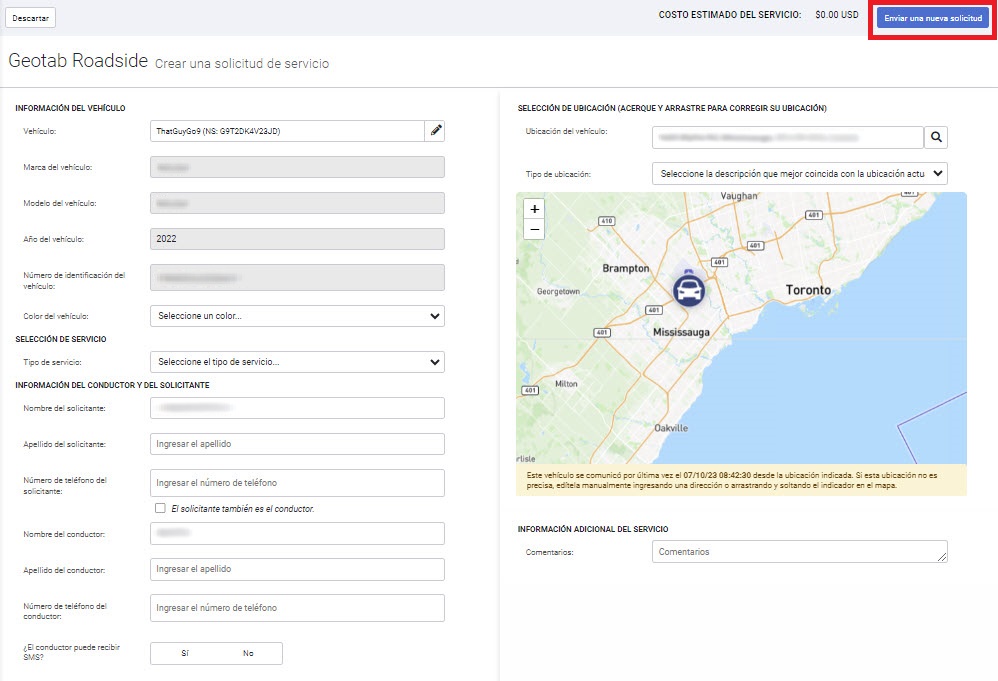
9 | Seleccione Enviar nueva solicitud cuando termine. Si olvidó alguno de los campos obligatorios, se mostrará una ventana emergente con los campos que debe completar antes de enviar su solicitud. Si su solicitud está completa, puede enviarla y ver los detalles.
| ||||
10 | Revise la información de contacto del conductor y seleccione Confirmar si es correcta. Seleccione Modificar la información si necesita actualizar el nombre o el número de teléfono del conductor.
| ||||
11 | Si el servicio solicitado no es complementario, aparecerá un mensaje de advertencia de Costo que usted debe asumir. Seleccione Confirmar para continuar a la autorización del pago.
| ||||
12 | Una vez que seleccione Confirmar, aparecerá la página Solicitud de servicio de Geotab con una visión general detallada de la nueva solicitud. Seleccione el botón Autorizar pago. Se mostrarán los costos totales que deberá autorizar. Si no desea continuar, seleccione Cancelar solicitud.
Si selecciona el botón Autorizar pago, se abrirá una nueva ventana en la que se mostrarán los detalles del servicio: ● Servicio solicitado ● Detalles de los vehículos ● Monto adeudado Complete el campo Credit Card (Tarjeta de crédito) con el mes, año y código de verificación de tarjeta (CVC). Ingrese un correo electrónico de contacto en el campo Send Receipt To (Enviar recibo a). Seleccione Authorize (Autorizar) cuando esté listo para completar la autorización del pago. ✱ NOTA: Se requiere un pago para despachar su servicio. No se harán cargos en su tarjeta hasta que se complete el servicio.
| ||||
13 | Después de autorizar su solicitud, puede seguir el estado y progreso de la solicitud con la línea de tiempo de la página de la solicitud. Es posible que la línea de tiempo del progreso se vea diferente y tenga fases adicionales según el tipo de servicio que elija.
|


Buscando un técnico
Se asigna un proveedor de servicios cercano tan pronto como cree la solicitud de servicio. Cuando se encuentre un proveedor, se le enviará a la ubicación del vehículo. En el mapa se mostrará la hora estimada de llegada del proveedor de servicios, así como su ubicación en tiempo real en el mapa, si está disponible.
Servicio en curso
En este paso del proceso, la página muestra la información acerca del servicio que se está realizando junto con la ubicación del vehículo del conductor y del vehículo de servicio (si está disponible). Si el servicio solicitado es de grúa, entonces la ubicación del vehículo del proveedor de servicios (si está disponible) y del vehículo remolcado se actualizarán en el mapa a medida que la grúa avance hacia su destino.

Ver solicitudes activas
Para ver las solicitudes de servicio activas, haga clic en la ID de la solicitud que aparece en la página Solicitudes de servicio. Los administradores y los usuarios de la aplicación Drive pueden ver las solicitudes de servicio actualmente activas en el sistema para conocer su estado. Para entender los detalles que se muestran en el panel del lado derecho, consulte la siguiente información.
1 | La primera sección muestra la etapa de la solicitud del servicio seleccionado.
| ||||||
2 | En la pestaña Detalles de la solicitud puede revisar la información del conductor y del vehículo, la información de la solicitud de servicio y la información del proveedor de servicios.
| ||||||
3 | La pestaña Mapa muestra hasta tres marcadores en el mapa:
|