Personal Mode User Guide
User Guide
0 mins to read
Learn more about Personal Mode, which allows drivers and fleet managers to temporarily hide vehicle tracking in MyGeotab. When Personal Mode is enabled, location features that use GPS such as position, trips and speed profiles are not displayed in the application. Features that do not use GPS such as engine and accelerometer data remain visible.
Understanding Personal Mode
Introduction
Personal Mode allows drivers and fleet managers to temporarily hide vehicle tracking in the fleet management application. When Personal Mode is enabled, location features that use GPS such as position, trips, and speed profiles are not displayed in the application.
Features that do not use GPS such as engine and accelerometer data are displayed in the application. Since GPS data is not accessible in Personal Mode, other features such as reports or Add-Ins may function differently when Personal Mode is enabled.
Personal Mode is intended for market-specific cases in which the driver requires intervals of privacy such as using a work vehicle for personal time. Personal Mode should not be used in conjunction with compliance features such as Hours of Service (HOS) or International Fuel Tax Agreement (IFTA) reporting.
Driving data collected by a vehicle in Personal Mode is stored as “private”. In the event of an accident, private data can be extracted in order to assist with accident reconstruction, provided permission is granted to access this data. Before granting permission, the fleet operator should receive consent from the driver of the impacted vehicle.
✱ NOTE: The Fleet Management Application supports two types of speed profiles; GPS and engine. Please be aware that when Personal Mode is set to ON, your GPS speed profile is private; however, your engine speed profile is not.
There are two ways to enable Personal Mode:
Exception Rules | Set conditions to automatically turn Personal Mode on and off (for example, after work hours rule). |
Marketplace Add-In | Install the Personal Mode Add-In to manually toggle Personal Mode between Personal and Business while using the fleet management application or the Drive App. |
Considerations
! IMPORTANT: The use of Personal Mode in your day-to-day operations is incompatible with the Data Science Package. All data points captured by the telematics device in your vehicles, even when Personal Mode is activated, will be made available without restriction in the Data Science Package. If you use Personal Mode, we do not recommend that you use the Data Science Package.
✱ NOTES:
- The data generated by vehicles in Personal Mode is still stored in the unified database to be used at an aggregate level for benchmarking, operational, statistical, and other analytic purposes.
- Reports do not include data from vehicles when in Personal Mode, which may lead to anomalous results.
- This guide assumes you have an understanding of the features and capabilities of the fleet management application and the Drive App.
Enable Personal Mode using exception rules
Personal Mode can be configured to automatically turn on and off based on conditions set in the application’s Exception Rules. For example, Personal Mode can be enabled or disabled by defining work or after work hours; or by hiding routes inside a designated private zone.
To create a rule to turn Personal Mode on and off, follow the steps below:
1 | Navigate to Rules & Groups > Rules from the main menu. |
2 | On the Rules page, click the Add button. |
3 | On the Exception Rules Edit page, name the new rule. |
4 | Under the Conditions tab, set the conditions. See use cases below. |
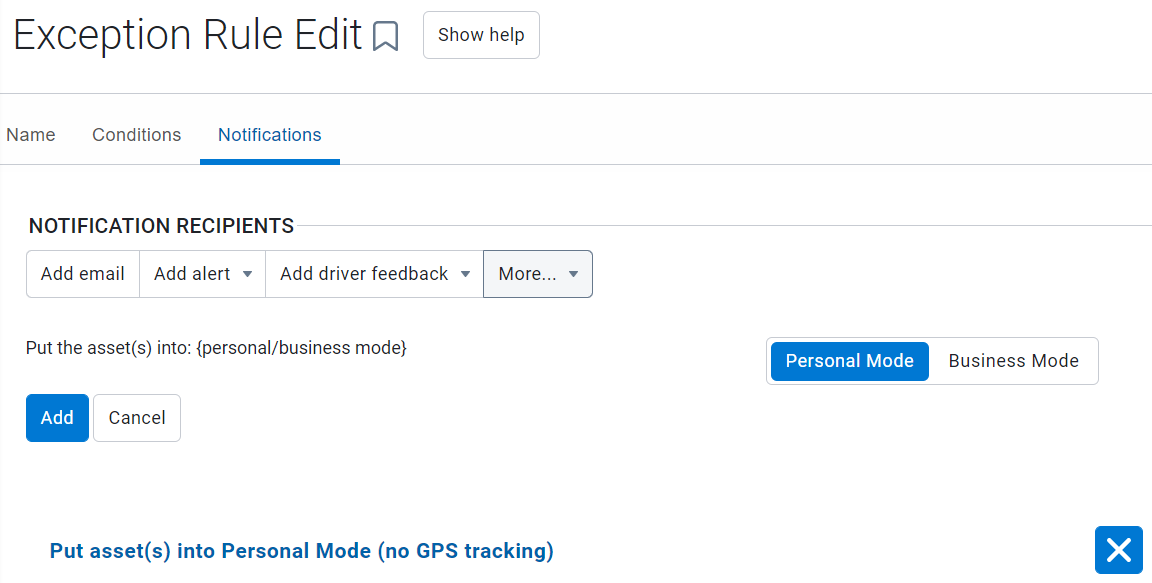
5 | Under the Notifications tab, select More… and click Assign as Personal/Business from the dropdown menu. |
6 | Click the Add button, then click the Save button to save the new rule.
|
7 | When Personal Mode is enabled, the trip displays as “Personal trip” in the Trip History. To view the Trip History, navigate to Map from the main menu, click the Trip History button and select the vehicle and date range.
|
Use cases — Personal Mode exception rules
The use cases below are intended to introduce users to two real-world applications of the Personal Mode feature. However, these are not the only conditions in which to move in and out of Personal Mode. The feature is flexible and will allow users to create and customize their own Personal Mode rules.
Use Case 1 — Set a rule to automatically enable Personal Mode after work hours
This example demonstrates how to automatically enable Personal Mode when operating a vehicle after regular work hours; and how to exit Personal Mode when operating a vehicle during regular work hours. This feature is useful for drivers who use their work vehicles for personal purposes, and do not wish to manually enable Personal Mode.
✱ NOTE: To automatically enable then disable Personal Mode in a specified time period, you must create two rules; one to enable Personal Mode and one to disable Personal Mode. You cannot create one rule to perform both operations.
Enable Personal Mode after work hours
To create an After Work Hours rule to automatically enable Personal Mode, follow the steps below:
1 | Navigate to Rules & Groups > Rules from the main menu. |
2 | On the Rules page, click the Add button. |
3 | On the Exception Rules Edit page, name the new rule. |
4 | Under the Conditions tab, click the Advanced conditions editor button.
|
5 | Paste the following code into the Advanced Conditions Editor. |
And( Ignition[true], AfterRuleWorkHours[workHours=WorkTimeStandardHoursId], ) | |
6 | The condition checks to see if the vehicle is on, and if the current time is after standard work hours (for example, 08:00 –17:00). |
7 | Under the Notifications tab, select More… and click Assign as Personal/Business from the dropdown menu. |
8 | Click the Personal Mode button, then click Add. If you wish to manually exit Personal Mode before the work hours rule expires, click the Business Mode button.
|
9 | Click Save to save the new After Work Hours rule. |
Disable Personal Mode during work hours
To disable Personal Mode during work hours, you must reverse the After Work Hours rule and create a Work Hours rule. To do this, follow the steps below:
1 | Repeat steps 1–3 in Enable Personal Mode After Work Hours to name the rule and open the Advanced Conditions Editor. |
2 | Paste the following code into the Advanced Conditions Editor. |
And( Ignition[true], RuleWorkHours[workHours=WorkTimeStandardHoursId], ) | |
3 | The condition checks to see if the vehicle is on, and if the current time is during standard work hours (e.g. 08:00 –17:00). |
4 | Under the Notifications tab, select More… and click Assign as Personal/Business from the dropdown menu. |
5 | Click the Business Mode button, then click Add. If you wish to manually enable Personal Mode before the work hours rule expires, click the Personal Mode button.
|
6 | Click Save to save the new Work Hours rule. |
Use Case 2 — Set a rule to automatically enable Personal Mode inside a zone
This example demonstrates how to automatically enable Personal Mode when operating a vehicle inside a private zone; and how to exit Personal Mode when operating a vehicle outside a private zone. This feature is useful for drivers who use their work vehicles in their Home zones, and do not wish to manually enable Personal Mode.
Enable Personal Mode inside a zone
To create a rule to automatically enable Personal Mode inside a zone, follow the steps below:
1 | Navigate to Rules & Groups > Rules from the main menu. |
2 | On the Rules page, click the Add button. |
3 | On the Exception Rules Edit page, name the new rule. |
4 | Under the Conditions tab, click the Add zone or zone type button. |
5 | In the Zone group box, click Zone and select the zone from the dropdown menu. |
6 | Click Entering to define the Event, then click Add. |
7 | The Conditions editor updates to display the selected event and zone.
|
8 | Under the Notifications tab, select More… and click Assign as Personal/Business from the dropdown menu. |
9 | Click the Personal Mode button, then click Add. If you wish to manually disable Personal Mode inside the private zone, click the Business Mode button. |
| |
10 | Click Save to save the new private zone. |
Disable Personal Mode inside a zone
To disable Personal Mode inside a private zone, you must create a new rule when exiting the private zone. To do this, follow the steps below:
1 | Repeat steps 1–4 in Enable Personal Mode Inside a Zone to select a zone and open the Advanced Conditions Editor. |
2 | Click Exiting to define the Event, then click Add.
|
3 | Under the Notifications tab, select More… and click Assign as Personal/Business from the dropdown menu. |
4 | Click the Business Mode button, then click Add. If you wish to manually enable Personal Mode inside the private zone, click the Personal Mode button.
|
5 | Click Save to save the new private zone. |
Enable Personal Mode using the Marketplace Add-in
The Personal Mode Add-In can be installed from the Marketplace to allow users to freely toggle Personal Mode between Personal and Business. The Add-in is available for both the fleet management application and the Drive App.
Minimum security clearance
Access to the Personal Mode Add-In is controlled by the Security Clearance feature. Unless you are an Administrator, Add-in users must have the appropriate Security Clearance before they can use the Personal Mode Add-In.
To set the appropriate Security Clearance to use the Personal Mode Add-In, follow the steps below.
1 | Navigate to Administration > Users from the main menu. |
2 | Click the Clearances button and select the Security Clearance. |
3 | In the Security Clearance Edit page, click the Add Sub-Clearance button. |
4 | Name the new sub-clearance and in the Access to feature: field, search for the Put vehicles into Personal Mode and Business Mode. |
5 | Select Put vehicles into Personal Mode and Business Mode, and click Save.
|
6 | In addition to Put vehicles into Personal Mode and Business Mode, other sub-clearances may be required in order to manually change the Personal Mode status using the Add-in. These depend on the level of clearance provided to you by your Administrator. The minimum clearances required to use the Personal Mode feature are:
|
Once you have set the appropriate Security Clearances, follow the steps below to enable the Personal Mode Add-In.
Install the Personal Mode Add-in
To install the Personal Mode Add-In, follow the steps below:
1 | Navigate to Marketplace from the main menu. |
2 | Use the Search bar to search for Personal Mode. |
3 | In the Marketplace Personal Mode Add-In page, click Add to Cart and complete the checkout process. Once complete, the Personal Mode Add-In begins installing. |
Enable Personal Mode using the application Add-in
To enable Personal Mode using the application Add-in, follow the steps below:
1 | When the Add-In has been successfully installed, navigate to Vehicles & Assets, and select the vehicle. |
2 | On the Asset Edit page, click the Personal Mode button to display the Personal | Business toggle buttons. |
3 | Select Personal to enable Personal Mode on the vehicle. |
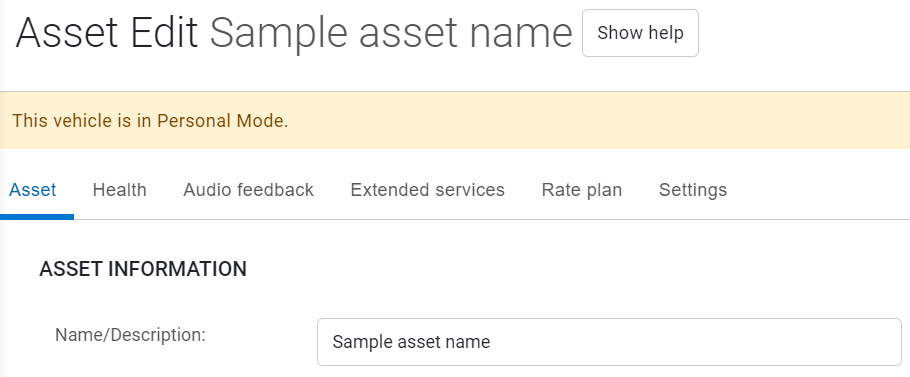
4 | The Asset Edit page refreshes and displays a notification confirming the vehicle is in Personal Mode. ✱ NOTE: Once you make a selection to toggle Personal Mode to Personal or Business, the toggle buttons disappear. To change Personal Mode to Business, click the Personal Mode button on the menu to re-enable the toggle buttons. You do not need to save your changes; they are applied automatically when you click Personal or Business.
|
Enable Personal Mode using the Drive App Add-In
To enable Personal Mode using the Drive App Add-in, follow the steps below:
1 | When the Add-in has been successfully installed, log into the Drive App. |
2 | From the Dashboard, tap Personal Mode. |
3 | In the Personal Mode Status screen, tap Personal. The Current Status updates to Personal.
|
4 | In addition to updating the Personal Mode status in the Drive app, users can verify they are in Personal Mode by navigating to the Vehicle Edit page in the fleet management application. The Description: field updates to display a notification confirming the vehicle is in Personal Mode. The notification disappears when the vehicle is not in Personal Mode.
|
Auditing Personal Mode
Personal Mode status changes are recorded in the fleet management application Audit Log. When Personal Mode is enabled, the Audit Log records an Add trip type change event. To view the Audit Log, navigate to Administration > System > Audit Log.

Purging Data
Although data created in Personal Mode is hidden and cannot be accessed by users, it is still stored in the database. In certain situations, it may be necessary to purge data logged while in Personal Mode (e.g. to comply with a regulation). This can be achieved by configuring the application’s Purge feature to delete private data at specific time intervals.
Schedule a Purge
To use the Purge feature, follow the steps below:
1 | Navigate to Administration > System… > System Settings from the main menu. |
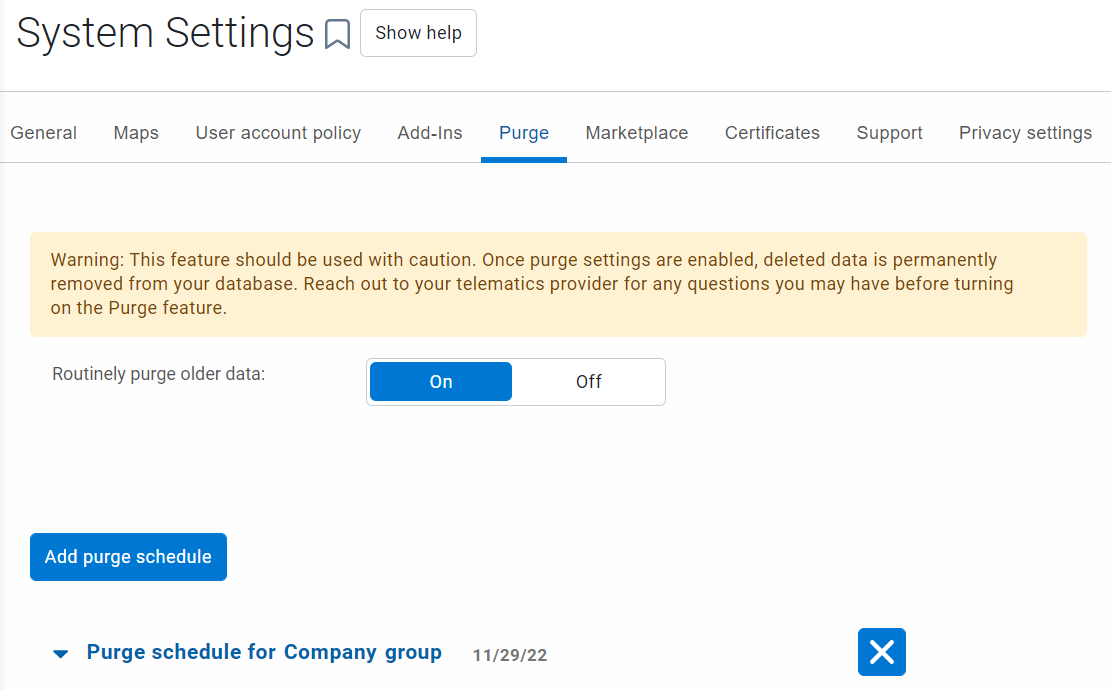
2 | Under the Purge tab, toggle Routinely purge older data to On to enable Purge Settings. |
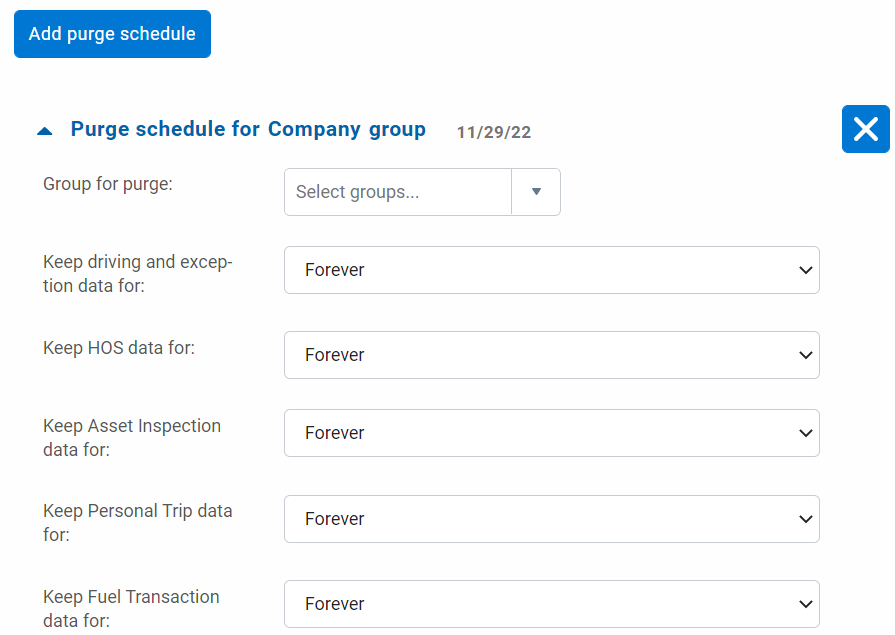
3 | Click Add purge schedule to set a purge schedule for a Group, then select the schedule to expand purge settings. |
| |
✱ NOTE: The Purge feature purges all data, including private data. | |
4 | If needed, select a different period in which to Keep Personal Trip data for: after its initial creation. When the selected period passes, private data older than the selected period will be permanently deleted.
|
5 | Select the remaining Purge settings. |
6 | Click Save. |
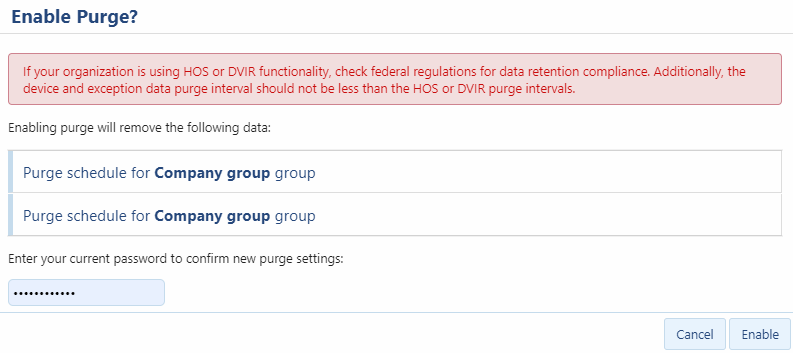
7 | A popup window displays the following message and prompts you to enter your password to enable the purge.
|
8 | Click Enable. |


