User Guide
0 mins to read
Data Sharing User Guide
User Guide
0 mins to read
Data Sharing allows users to collaborate with trusted business partners by sharing their telematics data to other Fleet Management Application databases. For example, as a rental company, I can share data to a client who is renting from me to ensure they have their telematics in their database.
User Guide
May 2024
Introduction
Data Sharing allows users to collaborate with trusted business partners by sharing their telematics data to other Fleet Management Application databases. For example, as a rental company, I can share data to a client who is renting from me to ensure they have their telematics in their database.
Data Sharing starts with a transaction between two Fleet Management Application users; a user from a Primary Database who makes a request to share telematics data to a user in a Target Database, who accepts or rejects the request based on the needs of their business.
! IMPORTANT: In order to improve our products, we may at any time, and without warning, change the design, presentation, or functionality of the software. The images shown here are for illustration purposes and may appear slightly different in the software.
Notes and Considerations
Prerequisites
- Telematics services can only be shared between active databases in the Fleet Management Application.
- To view shared services, users must have the View device share clearance.
- To accept/reject a Device Share, users must have the Administer device share clearance.
- By default, Administrators have the Administer device share and View device share clearances.
- Primary Database —The primary database from which the telematics data is being shared.
- Target Database — The database receiving the telematics data shared by a primary database.
- Active Database — A database that is currently in use in the Fleet Management Application.
Definitions
✱ NOTES:
- OEM Telematics can be shared in the same way GO devices data can be shared.
- Third-party integrations cannot be shared with additional databases at this time.
- Only data associated with the Rate Plan can be shared. Billing begins as soon as a request is accepted.
- Invoicing for Data Sharing is billed to the majority Partner for the target database.
- Driver names, group names, and zone names are private and not displayed in the target database.
- Data Sharing termination is now available for all Administrators both in the Primary and Target databases.
Sending a Data Sharing request
These steps are performed by the requestor from the Primary Database. To share data to a Target Database, follow the steps below. You must have the View device share clearance to start Data Sharing to another database. To learn more, please contact your Administrator.
1 | From the Fleet Management Application navigation menu, click Assets. |
2 | Select an asset from the list, or search by name or device serial number. |
3 | On the Asset page, open the Data Sharing tab. |
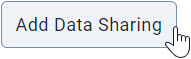
4 | Under the Data Sharing tab, click Add Data Sharing. Please note if the tab is greyed out, this is because the database is not receiving data from the telematics unit. The primary database must be receiving data before the device can be shared.
|
5 | Enter the name of the Target Database under Database. ✱ NOTE: The Target Database must have at least one GO9 (or equivalent Geotab device) asset to successfully accept a Data Sharing request. |
6 | Disable Location Data and Speed Data if you want to exclude location and/or speed data from your Data Sharing. |
7 | If desired, repeat steps 4 to 6 to add more databases. |
8 | When you are finished, click the Checkicon under Actions to send your request to the Target Database.
|
9 | After saving, a notification displays at the top of the page confirming the request was successfully sent to the Target Database. The notification remains on the page until it is dismissed by clicking the X symbol. |
10 | The Status under the Data Sharing tab changes from New to Pending. The service remains on the page until it is dismissed by clicking the X symbol. |
11 | The recipient of the target database can choose to accept or reject the request. If the request is accepted, the Status changes from Pending to Active, and billing associated with the selected Rate Plan begins. If the Data Sharing request is rejected, the Status changes from Pending to Rejected, and no billing begins.
✱ NOTE: For more on the Target Database workflow, refer to Receiving a Data Sharing request. |


Canceling a Data Sharing request
Data Sharing requests can only be canceled while in the Pending status. If the request was already accepted by the Target Database, refer to Removing Data Sharing.
To cancel a Pending request:
1 | Navigate to the Data Sharing tab on the Asset page and click the X symbol associated with the request under Actions.
|
2 | You are asked to confirm cancellation of the request. Review the message and click Cancel sharing to proceed, or Continue to continue sharing. |
3 | If you clicked Cancel sharing, the Service Status changes from Pending to Canceled. ✱ NOTE: The Target Database does not receive a notification that the Primary Database canceled the request. |

Receiving a Data Sharing request
These steps are performed by the recipient from the Target Database. To accept or reject a Data Sharing request from a Primary Database, follow the steps below. Only incoming services in the Pending status can be accepted or rejected.
Accepting a request
1 | From the Fleet Management Application navigation menu, click Assets. |
2 | A notification displays at the top of the page letting you know that a Primary Database is requesting to start Data Sharing to your database. The notification remains on the page until it is dismissed by clicking the X symbol. ✱ NOTE: The request is only visible to recipients with the View device share clearance, and can only be accepted or rejected with the Administer device share clearance. If multiple requests are made, multiple notifications display. |
3 | Click View Data on the notification to view details of the Primary Database, then enter a name for the service in the Description/Name: field. When finished, click Accept. ✱ NOTE: If multiple assets are shared, they are listed in separate Description/Name: fields. |
4 | Another notification displays at the top of the page confirming the request was accepted. |
5 | Select the new asset from the Assets page list. Under the Data Sharing tab, the Status changes from Pending to Active. |
Rejecting a request
1 | From the Fleet Management Application navigation menu, click Assets. |
2 | A notification displays at the top of the page letting you know that a Primary Database is requesting to start Data Sharing to your database. The notification remains on the page until it is dismissed by clicking the X symbol. |
✱ NOTE: The request is only visible to recipients with the View device share clearance, and can only be accepted or rejected with the Administer device share clearance. If multiple requests are made, multiple notifications display. | |
3 | Click View Data to view details of the primary database, then enter a name for the service in the Description/Name: field. When finished, click Reject. |
4 | The Status under the Data Sharing tab in the Primary Database changes from Pending to Rejected. ✱ NOTE: The Primary Database does not receive a notification that the Target Database rejected the request. |
5 | In the event the Target Database receives a Data Sharing request that was already accepted, the request is automatically rejected, and a notification displays at the top of the target database. |
Removing Data Sharing
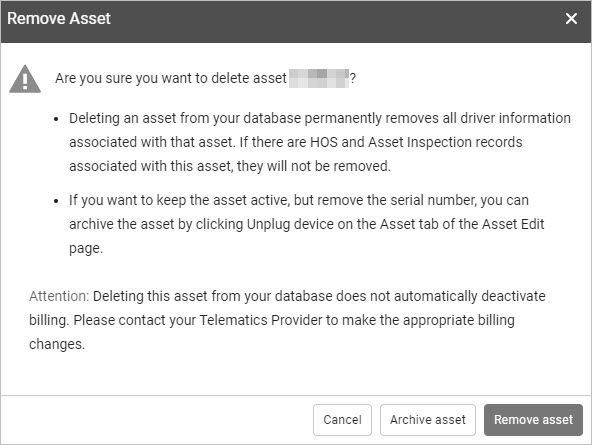
! IMPORTANT: You can remove a device from the Target Database after accepting a Data Sharing request from a Primary Database. However, removing a device does not remove billing for the subscription. To deactivate billing, Data Sharing must be terminated. To terminate Data Sharing, please contact your Partner.
To remove a device from a Target Database:
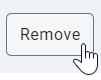
1 | Navigate to the Asset page, and click Remove from the top bar.
|
2 | Review the messages in the Remove Asset dialog, and when finished, click Remove asset.
|
Viewing a terminated Data Sharing
When a Data Sharing is terminated, billing is also terminated. Users on the Target database can view terminated Data Sharing requests by following these steps:
1 | Navigate to the Asset page, then open the Data Sharing tab.
|
2 | Under the Status column, look for Terminated. |

Changing the Rate Plan on Data Sharing
When the sender from a Primary Database sends a Data Sharing request to a Target Database, the sender can select a different Rate Plan, so only data associated with the selected Rate Plan is shared. For example, although devices in the Primary Database are subscribed to the GO Plan, the sender can choose to limit access to these services by selecting Base from the Plan dropdown menu on the Data Sharing request before sending it.
When the recipient of the Target Database accepts the Data Sharing request from the Primary Database, the recipient assumes the Rate Plan selected by the Primary Database, and billing begins immediately.
To change the Rate Plan on the Target Database after accepting a Data Sharing request from a Primary Database, the Data Sharing request must be terminated by the Partner, then requested again from the Primary Database under the new Rate Plan.