Installation Document
0 mins to read
Standard 16-Pin T-Harness Kit — HRN-GS16K22
Installation Document
0 mins to read
The HRN-GS16K22 harness kit is designed and intended for use only with the GO device or Geotab-authorized accessory devices. Intended for most light-duty and medium-duty vehicles — not intended for generic heavy-duty vehicle applications.
For the most up-to-date version, please visit: gtb.page.link/nnDU
! IMPORTANT: USA Only: Place the enclosed CARB Executive Order (EO) identification label sticker in the vehicle engine compartment, somewhere near the Vehicle Emission Control Information label on a smooth and clean surface. The EO identification label is required to aid inspection of the vehicle under the California Smog Check program and other applicable smog test programs. See here for more info.
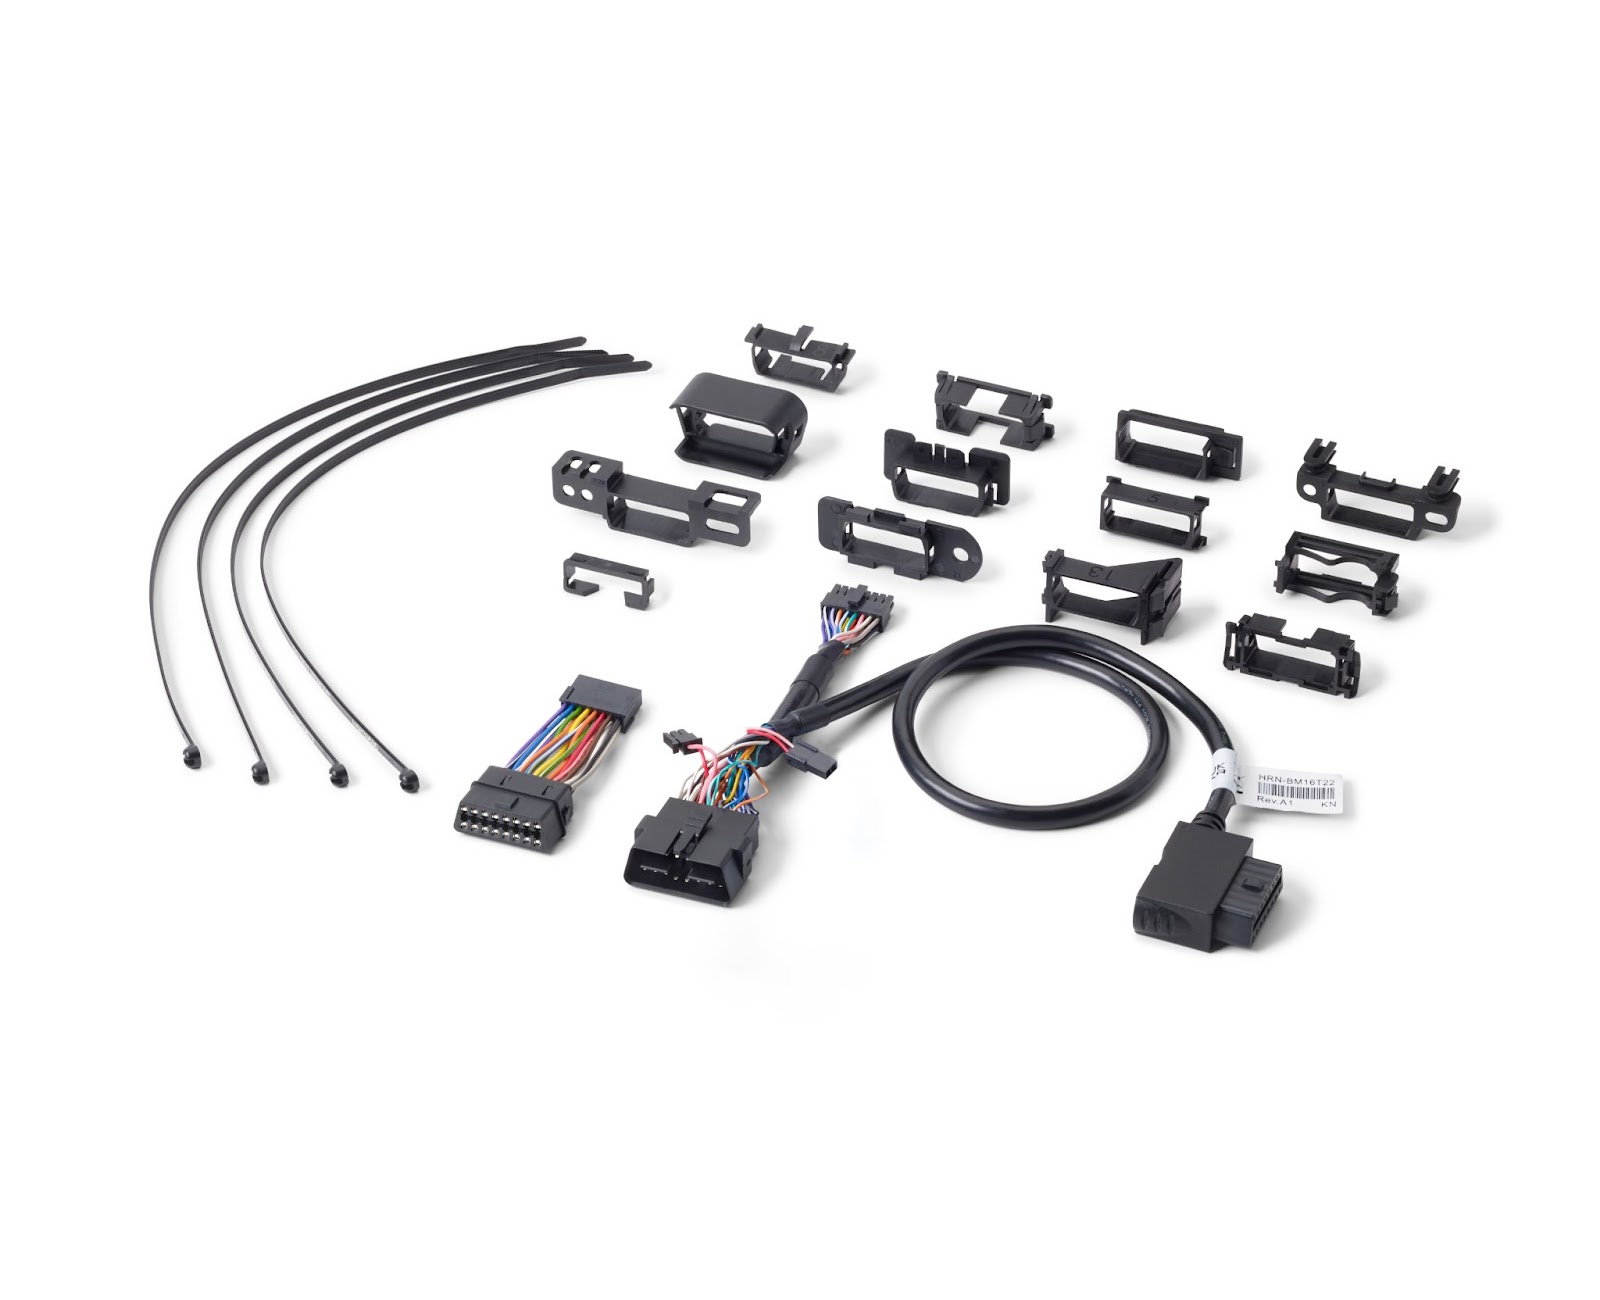
The HRN-GS16K22, an OBD-II 16-pin T-harness kit with 12 mounting brackets, connects a Geotab® GO device to most light-duty, medium-duty and some heavy-duty vehicles internationally. The HRN-GS16K22 contains the mounting adapters listed below and the adapter plastic is numbered for easy reference (see the Adapters section of this document for details):
|
Harness Technical Specifications
Weight | 214.3 g |
Size | Max Length: 630 mm Max Width: 40.7 mm |
Material | Universal Core Connector: PBT + 15% Glass filled Wire Jacket: Black PVC Jacket |
Connectors | 2 × Universal Core Connector 1 × 24 V compatible ALDL Connector |
Power Output | 8 V to 36 V |
Current Rating | 5 A |
Temperature Rating | −40 to +85 °C |
Adapters | See the Adapters section below |
WARNING! The HRN-GS16K22 harness kit is designed and intended for use only with the GO device or Geotab-authorized accessory devices. Professional installation from a Geotab Authorized Installer is required. Read and follow the complete GO device installation instructions (goo.gl/rkLRiA) as well as the installation instructions in this document to prevent serious personal injury or significant damage to your vehicle.
Adapters
1-2U |  | North American Flange Mount
| 3 | 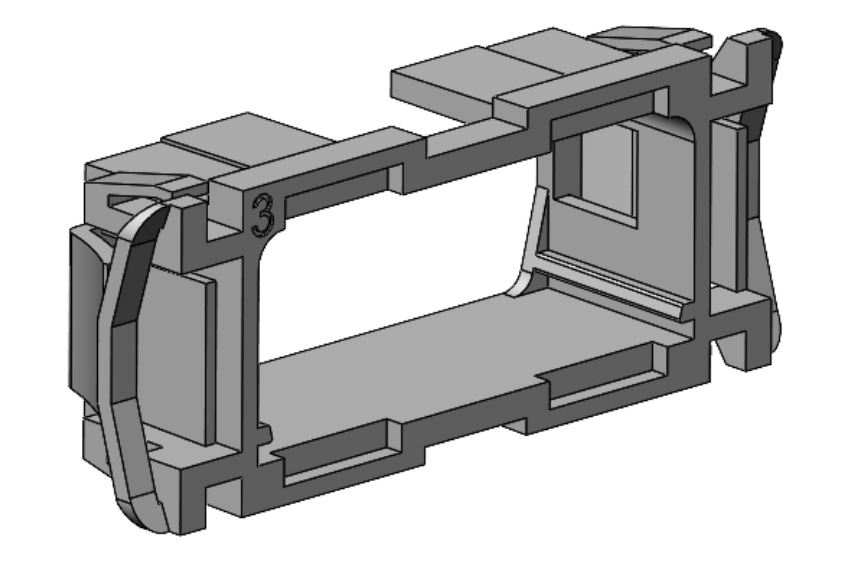 | North American Snap-In Mount
|
4 | 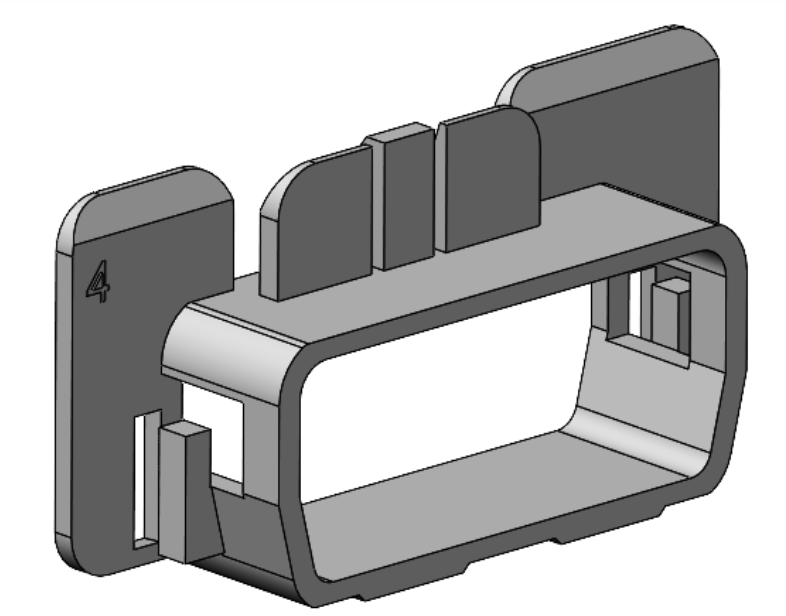 | North American Slide & Lock Mount | 5 | 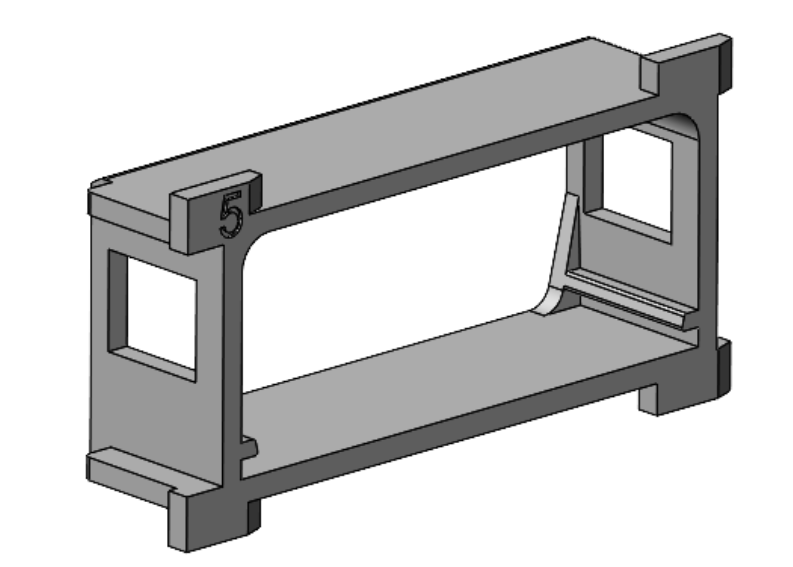 | European Lock Mount |
6 | 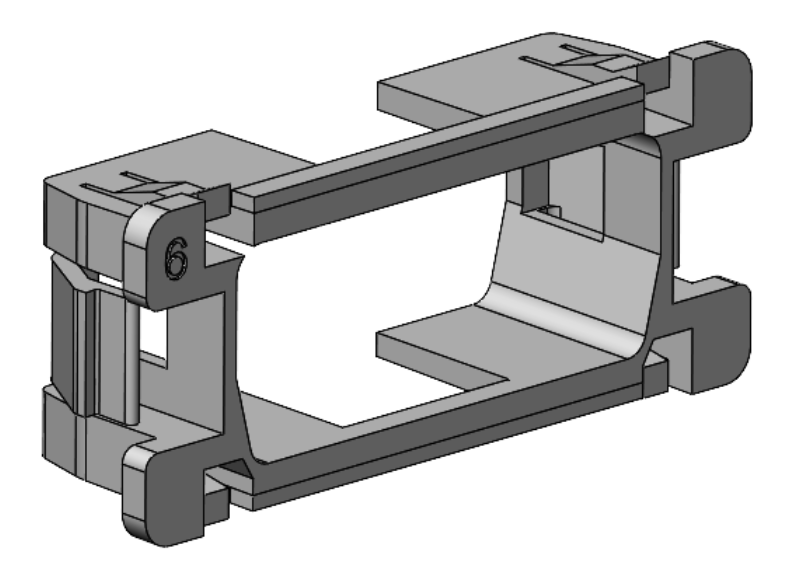 | Asian Snap-In | 7 | 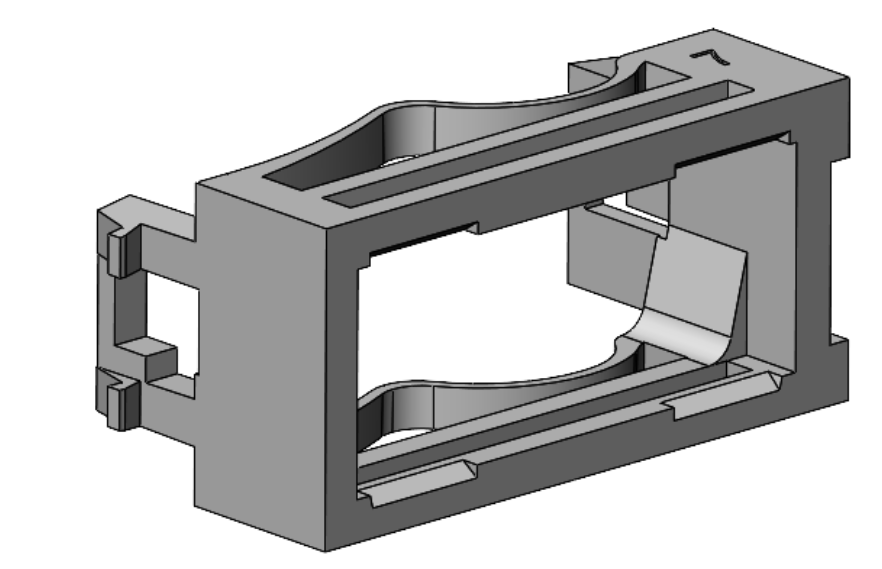 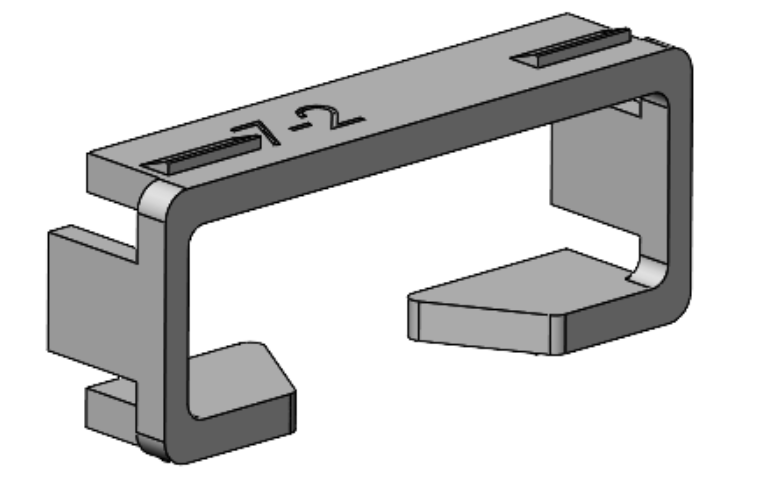 | European Latch & Snap |
8 | 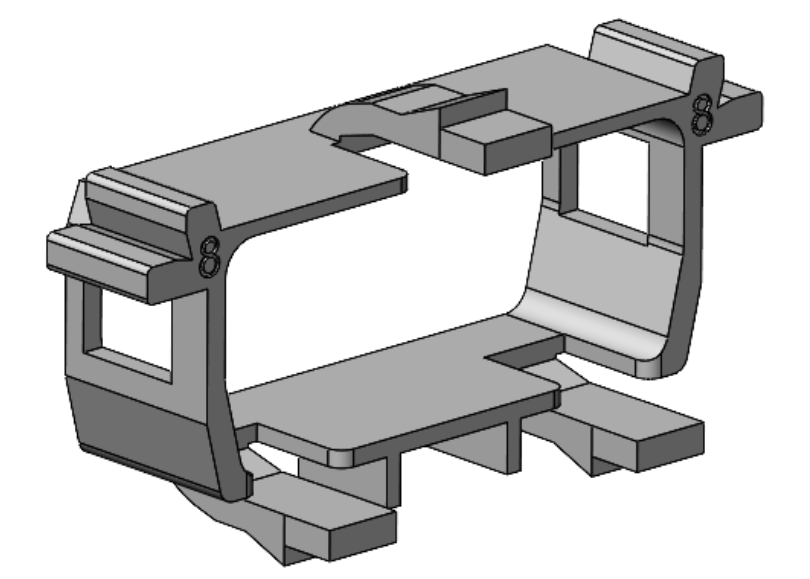 | VW Snap-In
| 9 | 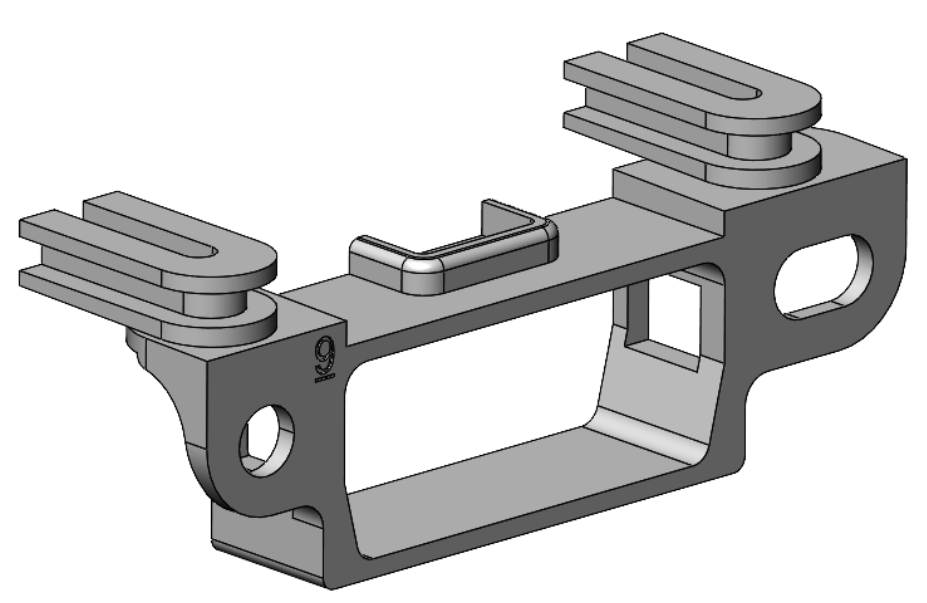 | BMW Slide & Lock |
10 | 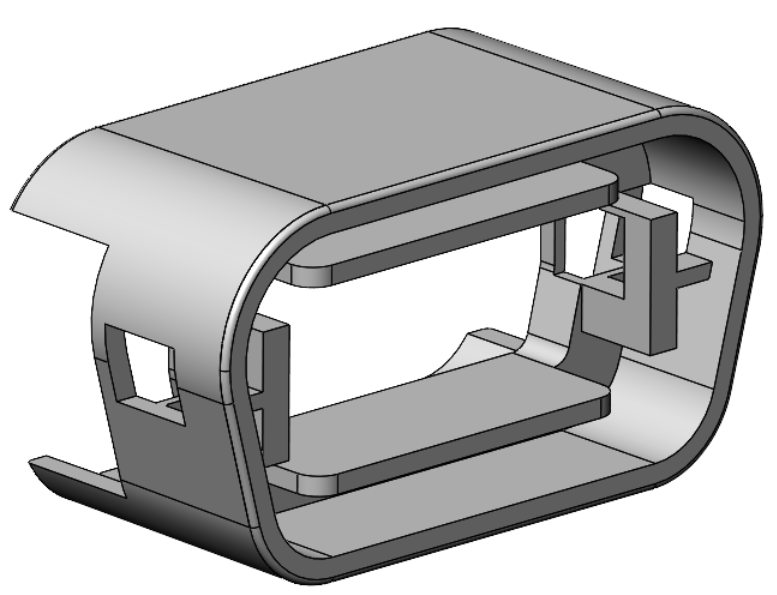 | Ford Round Snap-In | 11 | 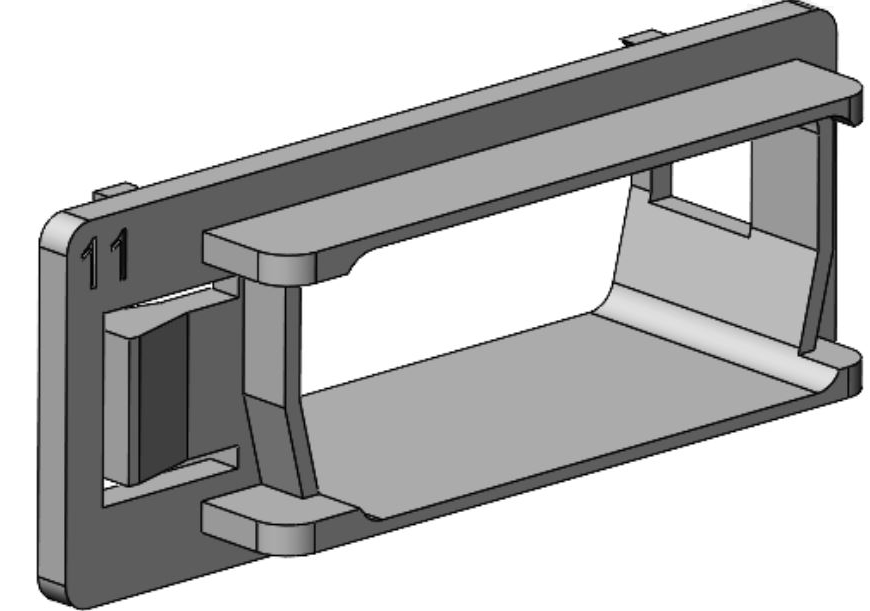 | MAN/DAF Slide & Lock
|
12 |  | Volvo Slide Mount
| 13 | 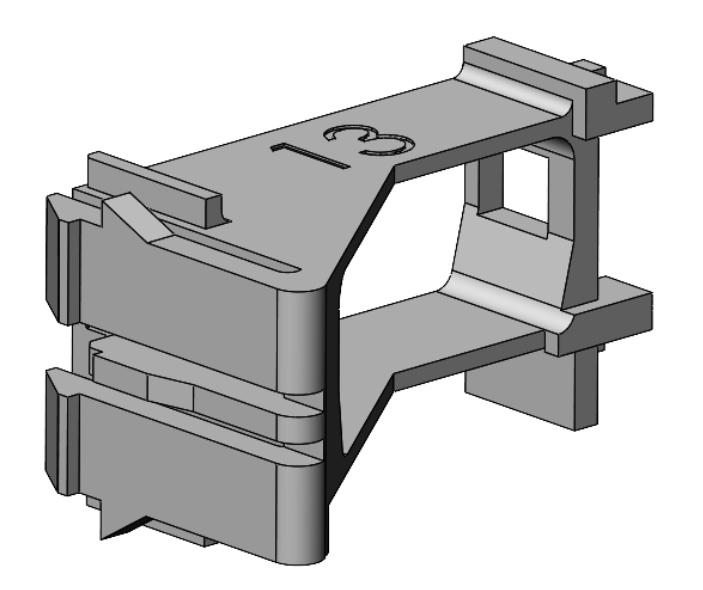 | Heavy-Duty Volvo Slide Mount
|
Mounted Adapters
1-2U | 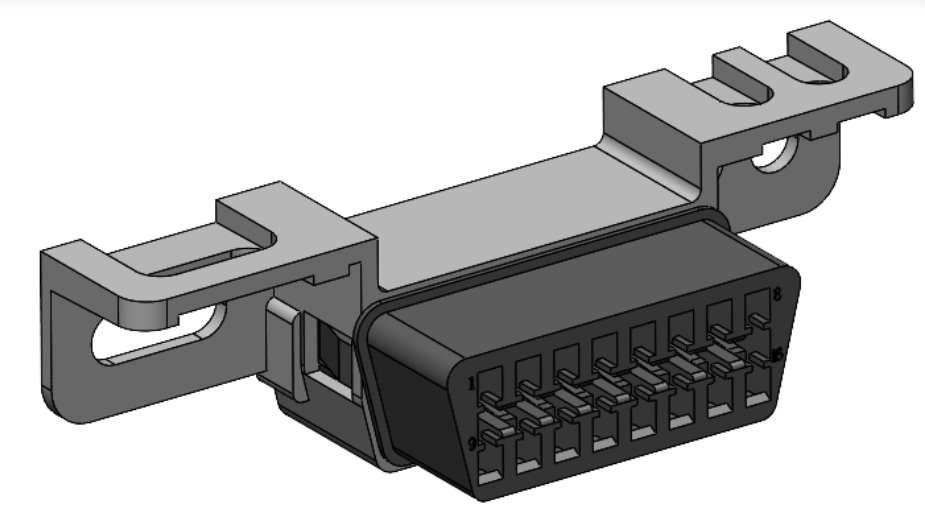 | North American Flange Mount | 3 | 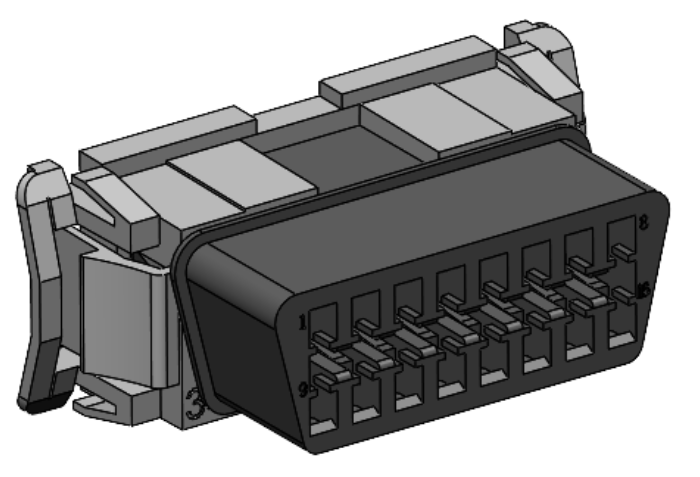 | North American Snap-In Mount
|
4 | 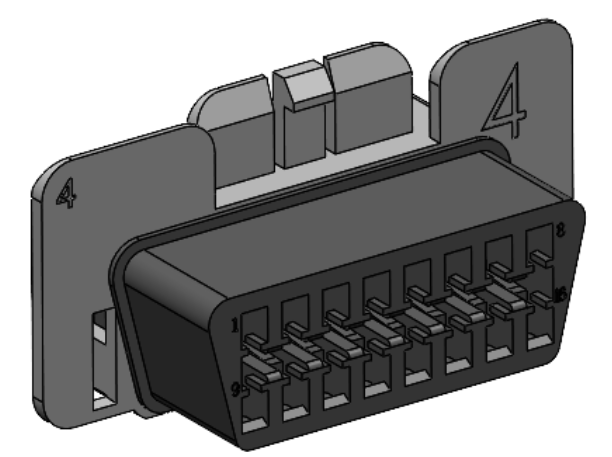 | North American Slide & Lock Mount | 5 | 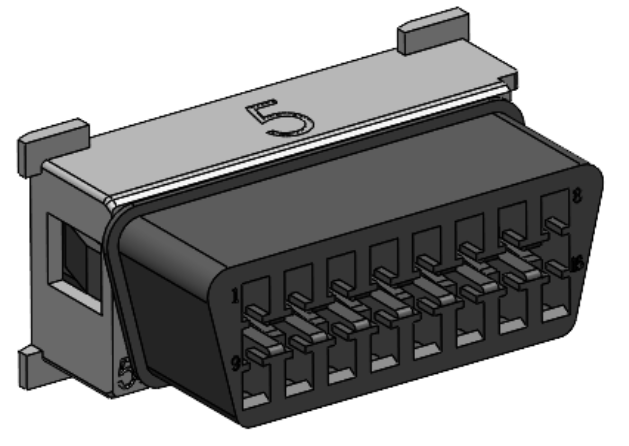 | European Lock Mount |
6 | 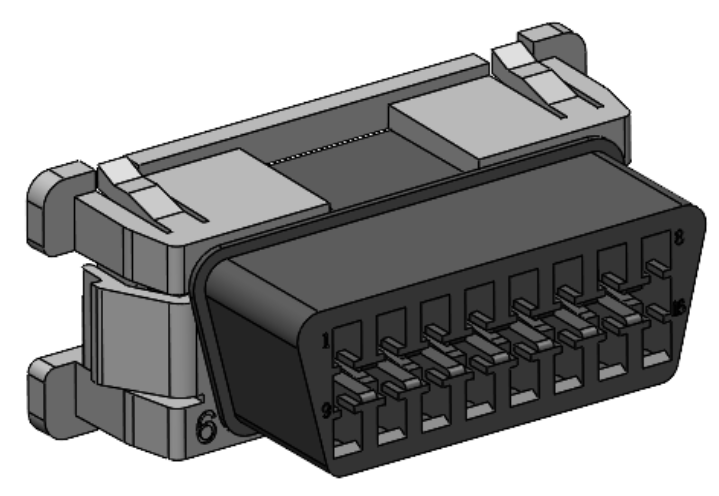 | Asian Snap-In | 7 | 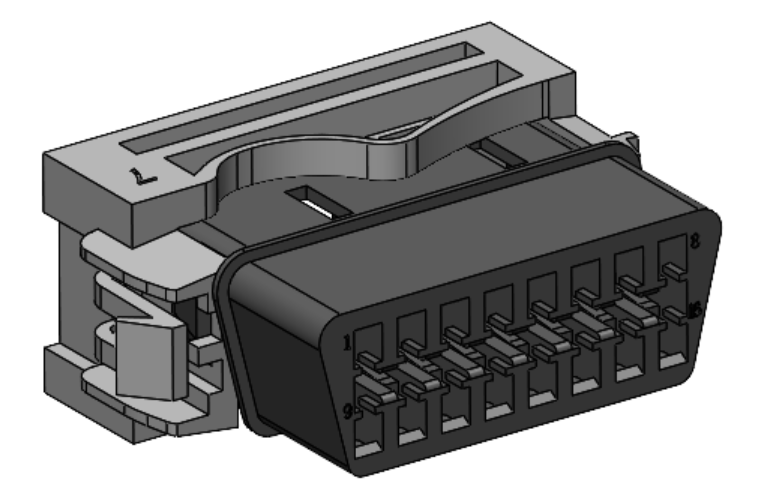 | European Latch & Snap |
8 | 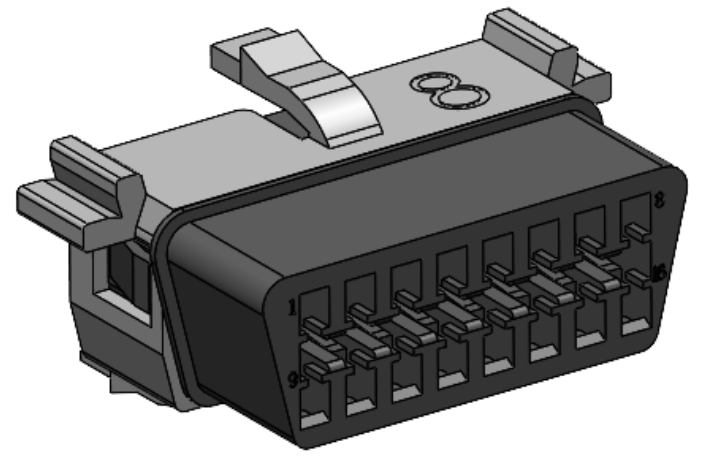 | VW Snap-In | 9 |  | BMW Slide & Lock |
10 |  | Ford Round Snap-In | 11 | 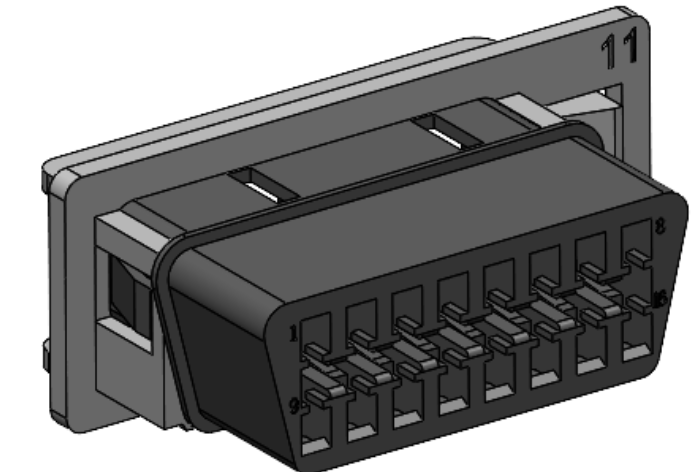 | MAN/DAF Slide & Lock |
12 | 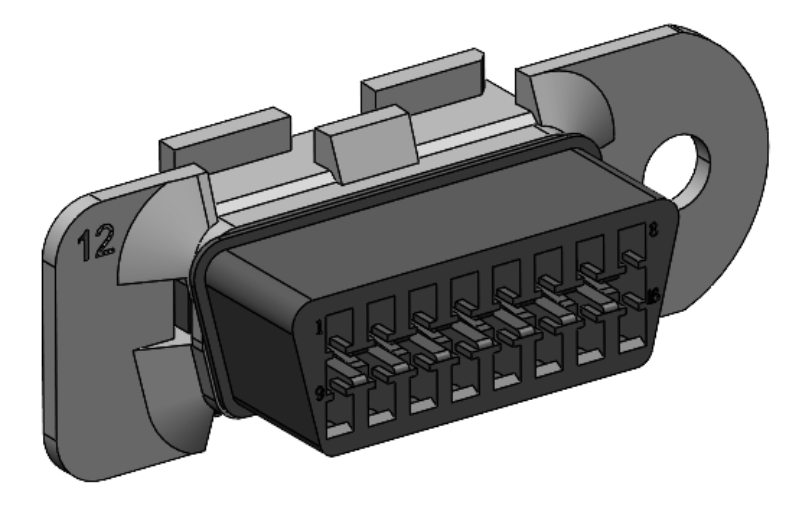 | Volvo Slide Mount | 13 | 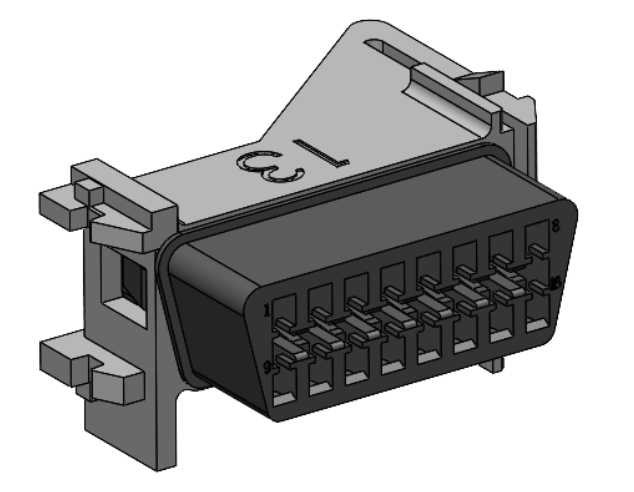 | Heavy-Duty Volvo Slide Mount |
Harness Assembly Instructions
1 | 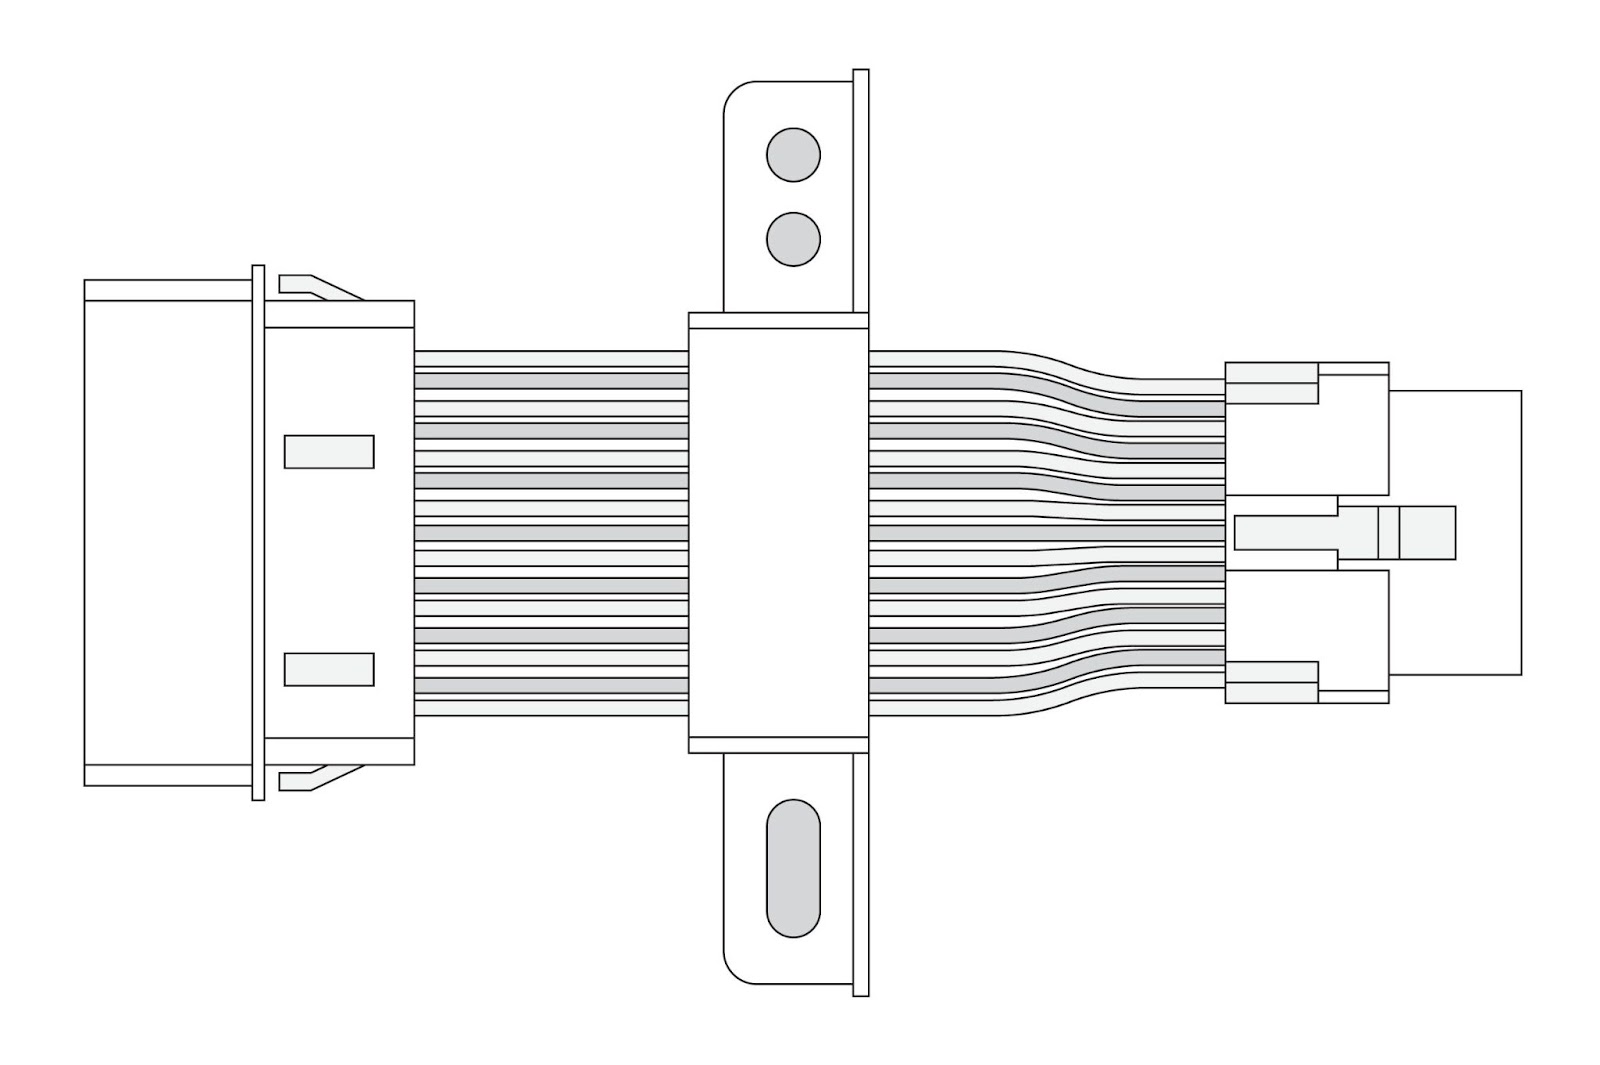 | |
2 | 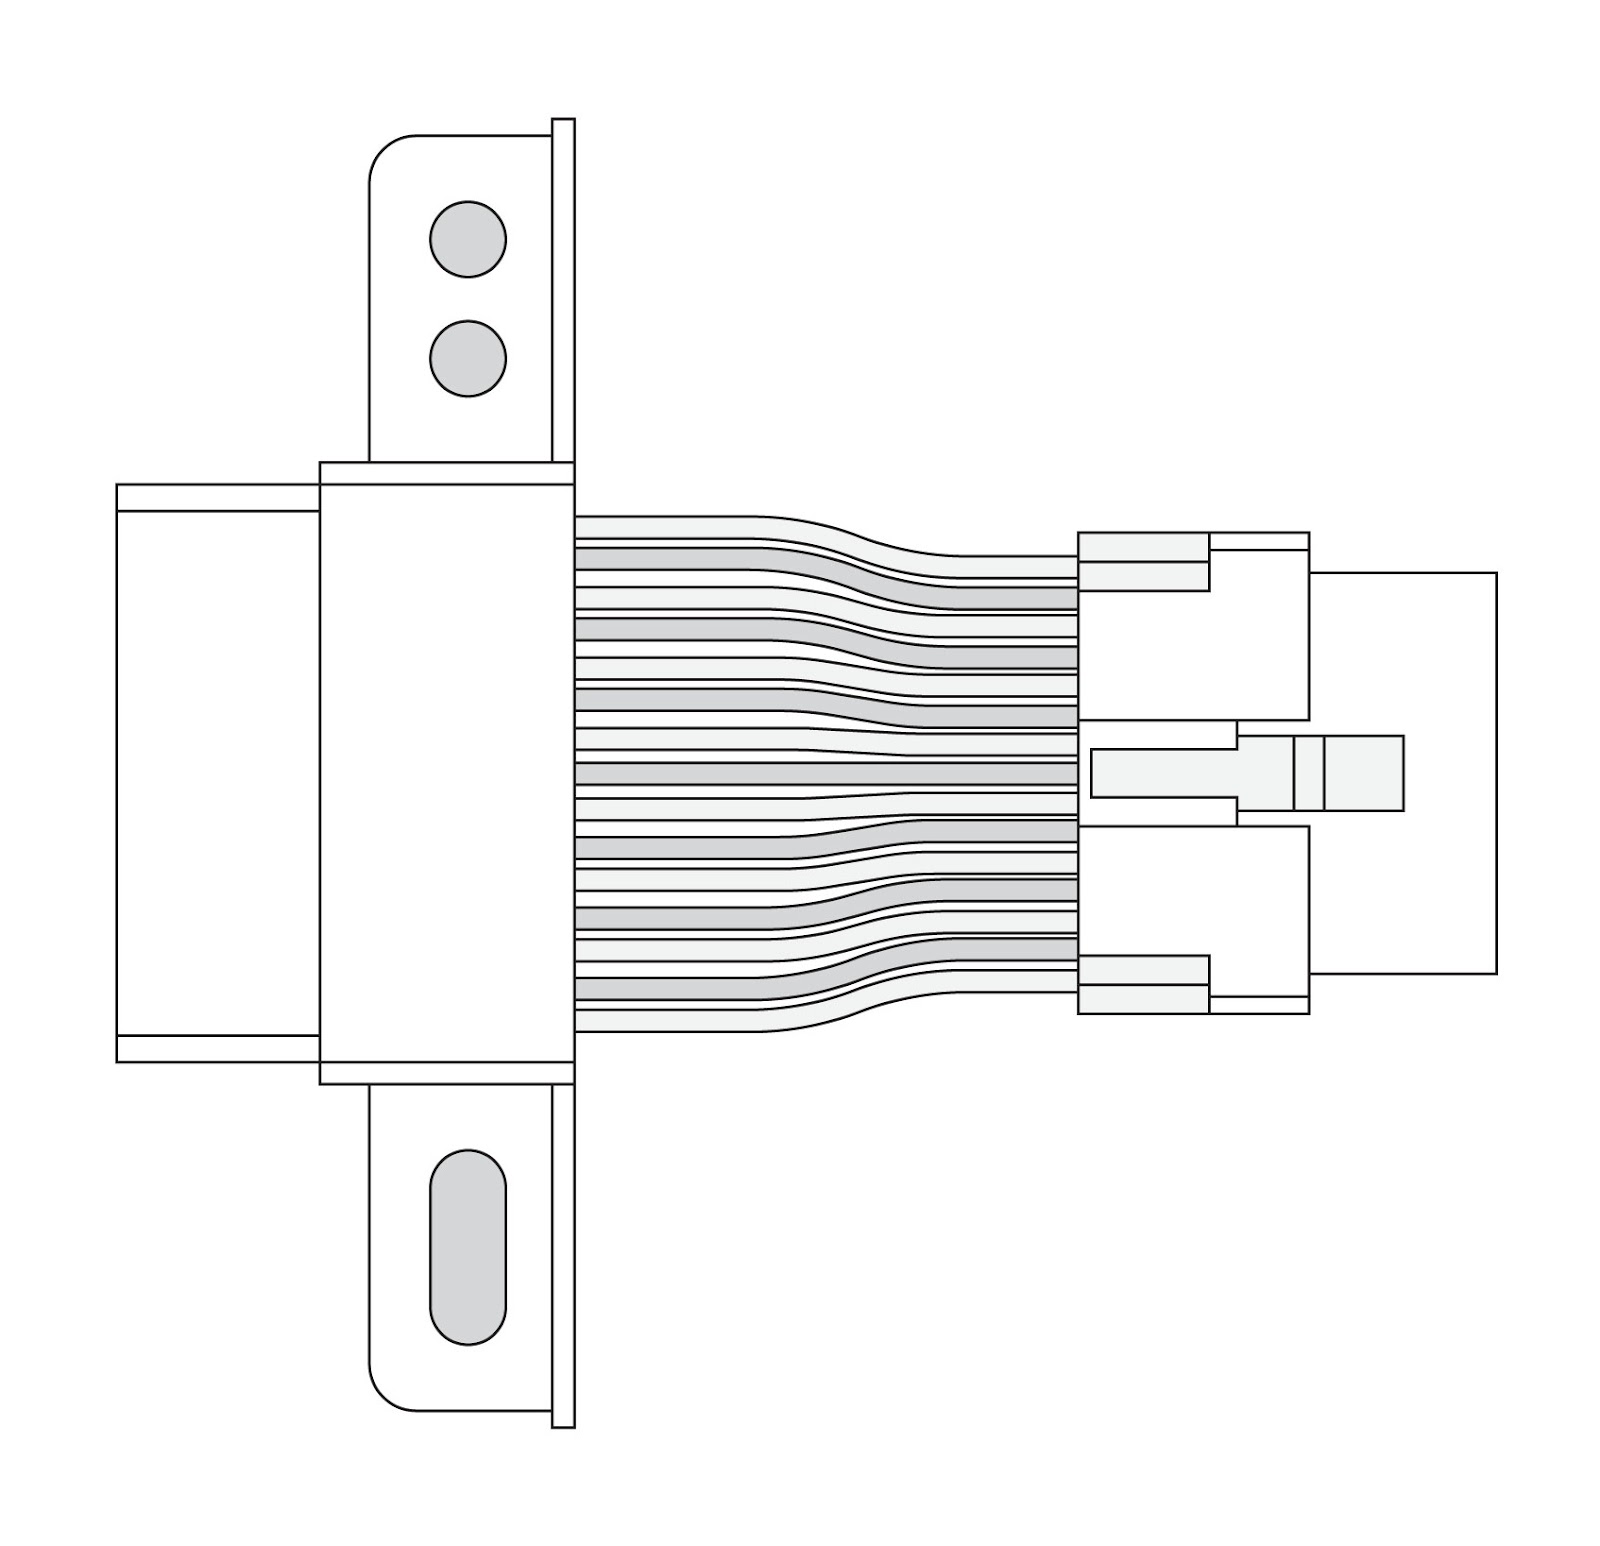 Lock the adapter into the locking tabs. | |
3 |  Connect the Molex connector to the other harness provided. | |
4 | 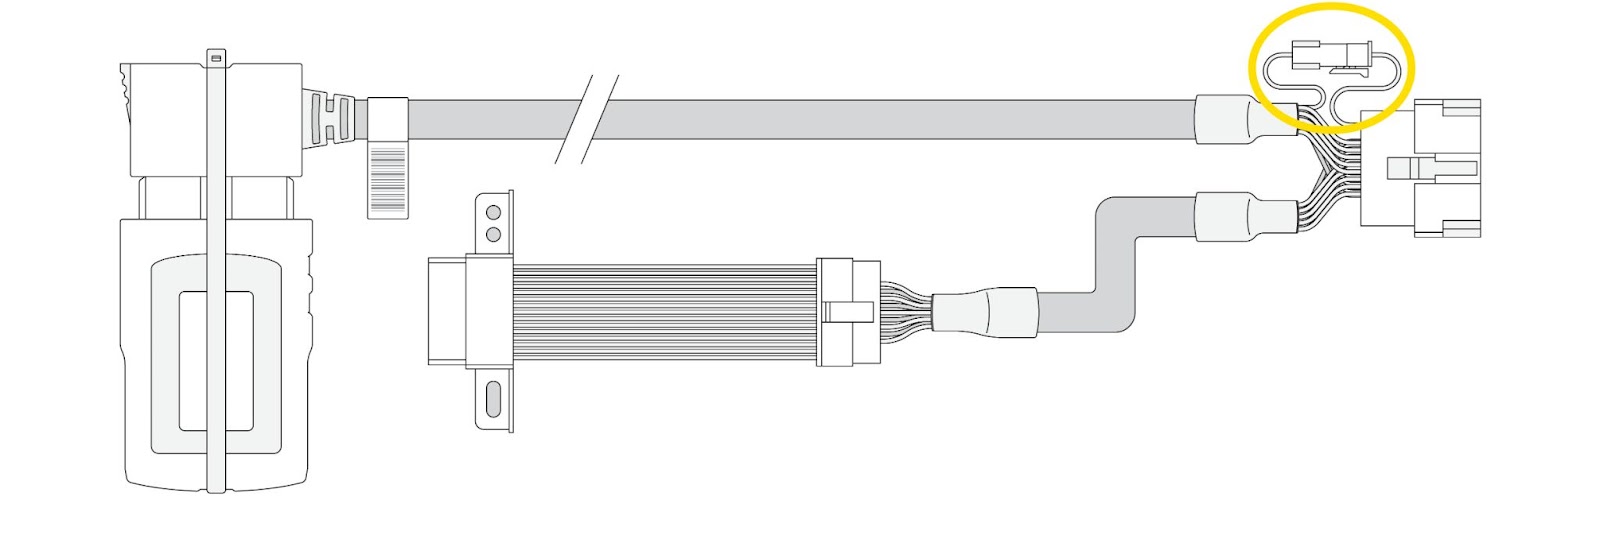 Connect the GO device to the harness and secure it with the provided cable tie. ! IMPORTANT: For Ethernet bypass (as in PINs 3 and 11), connect the 2-pin Molex connectors attached to the 16-pin T-harness (HRN-BM16T22) for select vehicles. To ensure this is correctly connected, wait for it to click. See the following link for the applicable vehicle list: https://gtb.page.link/DHyf | |
5 | 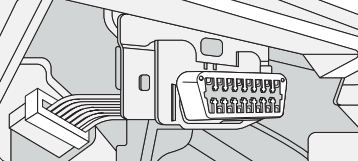 Remove the vehicle diagnostics connector and install the completed setup. |
European Latch & Snap
Replace Step 2 of the standard installation instructions with the following steps for Fiat, Citroën or Peugeot vehicles using the European Latch & Snap adapter (Adapter #7):
1 | Slide the European Latch & Snap adapter all the way to the back of the core connector (towards the left in the image). | 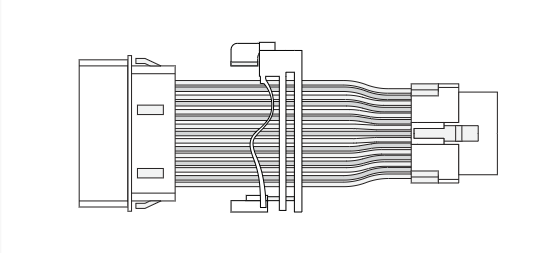 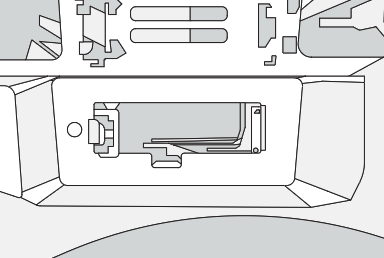 |
2 | Lock the adapter into place. | 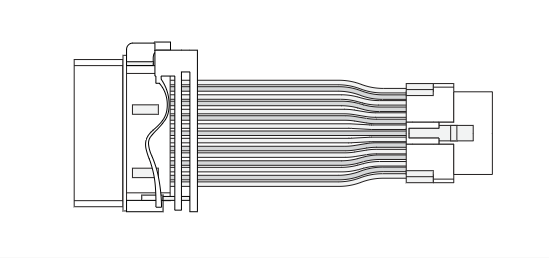 |
3 | Slide the small snap adapter 7-2 from the back of the harness. Ensure that the European Latch & Snap is securely interlocked. | 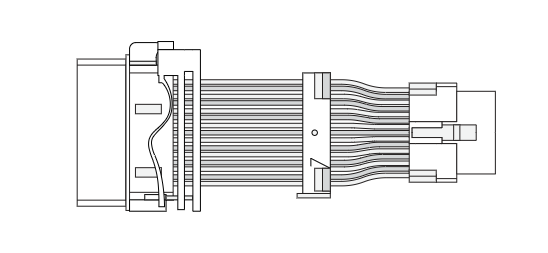 |
4 | Remove the vehicle diagnostics connector and install the completed setup. ✱ NOTE: On some vehicles (see the pictures to the right and below), you need to clip the adapter in the vehicle before connecting the rest of the T-harness. Inspect the vehicle’s connection port to see if this is the case. | 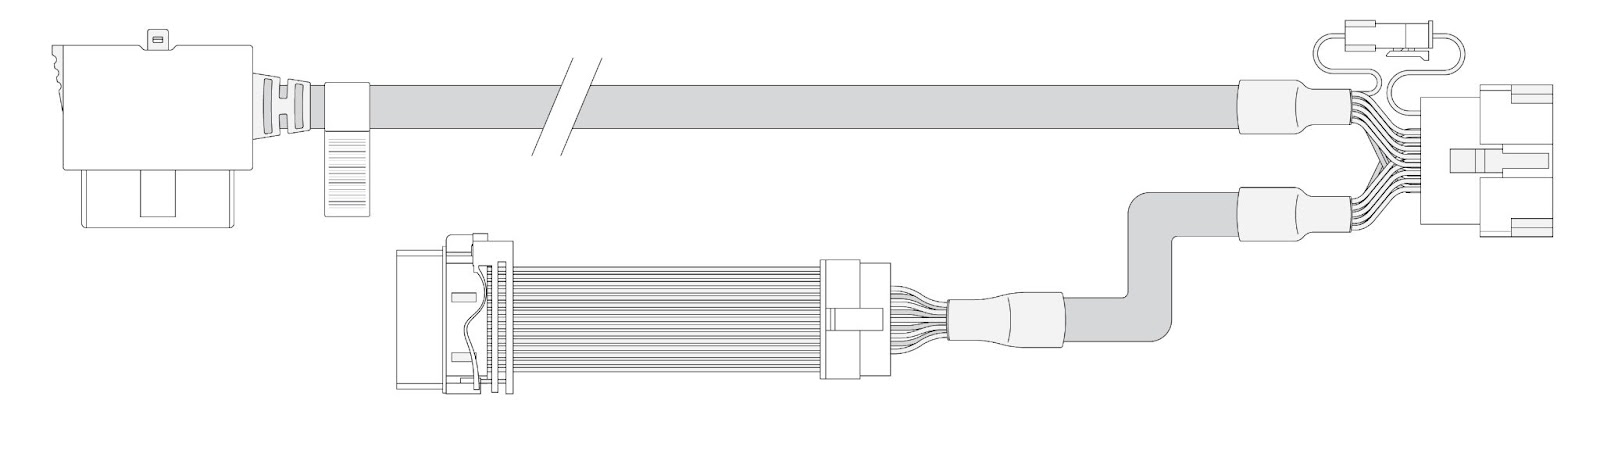 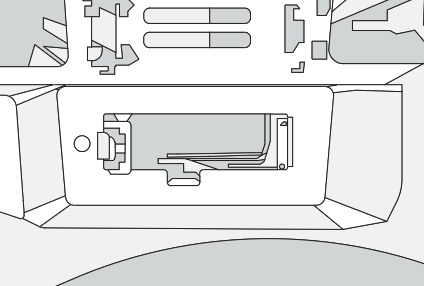 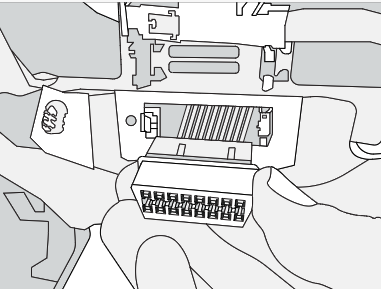 |
Ford Round Snap-In
Replace Step 2 of the standard installation instructions with the following step for Ford vehicles using the Ford Round Snap-In adapter.
1 | Slide the Ford Round Snap-In all the way to the back of the core connector. | 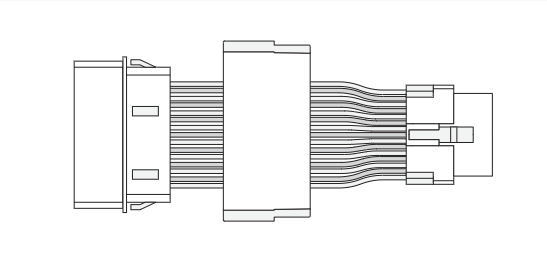 |
Securing the HRN-GS16K22 to the Ford OBD-II Module
Use two zip ties to secure the HRN-GS16K22 to the factory Ford OBD-II module shown below.

✱ NOTE: Over-tightening the zip tie may cause damage to the harness connector.
Important Safety Information and Limitations of Use
For the latest version of the Limitations of Use, please visit: goo.gl/k6Fp0w
WARNING! Do not attempt to install, configure or remove any product from any vehicle while the vehicle is in motion or otherwise in operation. All installation, configuration or removal must be done only in stationary vehicles which are securely parked. Attempting to service units while being operated could result in malfunctions or accidents, leading to death or serious personal injury.
WARNING! All in-vehicle devices and related cabling must be securely fastened and kept clear of all vehicle controls, including gas, brake and clutch pedals. You must inspect devices and cabling on a regular basis to ensure all devices and cabling continue to be securely attached. Loose cabling or devices may impede the use of vehicle controls, resulting in unanticipated acceleration, braking or other loss of vehicle control, which could lead to death or serious personal injury. Improperly fastened in-vehicle devices may detach and impact operators upon sudden acceleration or deceleration, which may cause injury.
WARNING! If at any point after an in-vehicle device is installed a warning lights up on the vehicle dash or the vehicle stalls or has a marked drop in performance, shut off the engine, remove the device, and contact your reseller. Continuing to operate a vehicle with these symptoms can cause loss of vehicle control, and serious injury.
WARNING! Your in-vehicle devices must be kept clear of debris, water and other environmental contaminants. Failure to do so may result in units malfunctioning or short-circuiting that can lead to a fire hazard or vehicle damage or serious injury.
WARNING! Do not attempt to remove the devices from the vehicle in which they are originally installed for installation in another vehicle. Not all vehicles share compatibility, and doing so may result in unexpected interactions with your vehicle, including sudden loss of power or shutdown of the vehicle’s engine while in operation or cause your vehicle to operate poorly or erratically and cause death or serious injury and/or vehicle damage.
NOTICE: This product does not contain any user-serviceable parts. Configuration, servicing, and repairs must only be made by an authorized reseller or installer. Unauthorized servicing of these products will void your product warranty.

CAUTION! Always use adapter harness (HRN-CG13S1) with the GO9 (pre-V2) for heavy-duty trucks to avoid possible damage to the GO9 device. For more information, see gtb.page.link/mWQF
Regulatory Statements
Germany
Wir besitzen keine Versand- und Lagerfläche in Deutschland und sind nicht von der Rücknahmepflicht nach § 17 ElektroG betroffen.