Support Document
0 mins to read
GO7 RUGGED: Ruggedised telematics device
Support Document
0 mins to read
Learn more about the GO7 RUGGED, a ruggedized telematics device that offers GPS technology, g-force monitoring, Geotab IOX expandability, and an engine and battery health assessment. The GO7 RUGGED is ideal for heavy equipment, yellow iron, agricultural machinery, and oil field equipment.
Geotab® GO7 RUGGED® — Ruggedized Telematics Device (Discontinued)
For the most up-to-date version of this document, visit: https://goo.gl/kPMExT
GO7 RUGGED — Geotab’s ruggedized device
The GO7 RUGGED is a ruggedized telematics device that offers state-of-the-art GPS technology, g-force monitoring, Geotab IOX® expandability, and engine and battery health assessment. Using Geotab’s patented tracking algorithm, it accurately recreates a vehicle’s trips and analyzes its incidents. The GO7 RUGGED is ideal for: heavy equipment, yellow iron, agricultural machinery, and oil field equipment; the tracking of powered trailers and assets; and installations where the Geotab GO7 RUGGED device is exposed to the elements.
Top features
|
Additional features
Technical specifications and features
Interfaces | Engine Management
Input/Output |
Cellular | Availability varying on certification - full list of supported countries here Canada and USA
Other Regions — Certification Pending |
GPS Receiver | 50-channel engine Under 1 second Time-To-First Fix for hot and aided starts Hybrid GPS/SBAS engine (WAAS, EGNOS, MSAS) 3GPP compliant A-GPS: Differential Almanac Accuracy: ~3 m |
I/O Expandability Support (IOX) | Currently supports a combination of up to 5 of the following:
|
Accelerometer | 3-axis auto-calibrating accelerometer. Full scale (±2g, ±4g, ±8g & ±16g), capable of measuring accelerations with an output data rate of 100 Hz to 1250 Hz. |
Environmental and EMC | Operating Temperature: −40 to +85 °C SAE J1455
IP 67 |
Mechanical | Weight: 285 g (0.63 lb) Dimensions
Housing |
Electrical | Voltage: 12 V and 24 V systems supported Current (at 12 V)
Resettable overcurrent protection to IOX |
Compliance | Standards: FCC, IC, PTCRB Carriers: Telefónica |
Over The Air (OTA) Support | Firmware Updates: For maintenance, new features, and custom applications Parameters: For turning additional features on/off Almanac/Ephemeris Data: For quicker GPS latch |
Voltage Recording | Curve-based voltage logging to detect weak batteries, failing alternators, and failing starters. |
32-Mb Non-volatile Flash Memory | Main Data Memory: Up to 80,000 logs in offline mode (out of coverage) Accident Data Memory: Buffer records over 100 minutes of second-by-second data (6,000 logs). Last 72 records (1.2 minutes) are sent instantly on accelerometer-triggered accident-level events. |
Recording Parameters | Patented curve-based GPS/voltage/accelerometer/engine data logging algorithm for fewer, more accurate data points. Can be downrated to a basic trailer tracking configuration. |
Intelligent Ignition | Non-engine-based ignition detect on voltage and movement, allowing for 3-wire installation. Ideal for older vehicles with no engine information and covert installation for asset recovery. |
Differences between GO7® and GO7 RUGGED
Engine communication
GO7 RUGGED does not support the following engine protocols and corresponding engine information:
- Single-wire CAN: Seat belt and odometer data on some GM, Fiat, and Dodge vehicles
- Medium Speed CAN: Ford transit and Mazda seat belt
Buzzer and other IOX Add-ons
The GO7 RUGGED is made for external environments and can be installed outside of a vehicle; as such, there is no internal buzzer. The IOX-BUZZ (external buzzer) or IOX-GOTALK can be installed if driver feedback is required. The HRN-RX06S4 is required to install any IOX.
Harness options
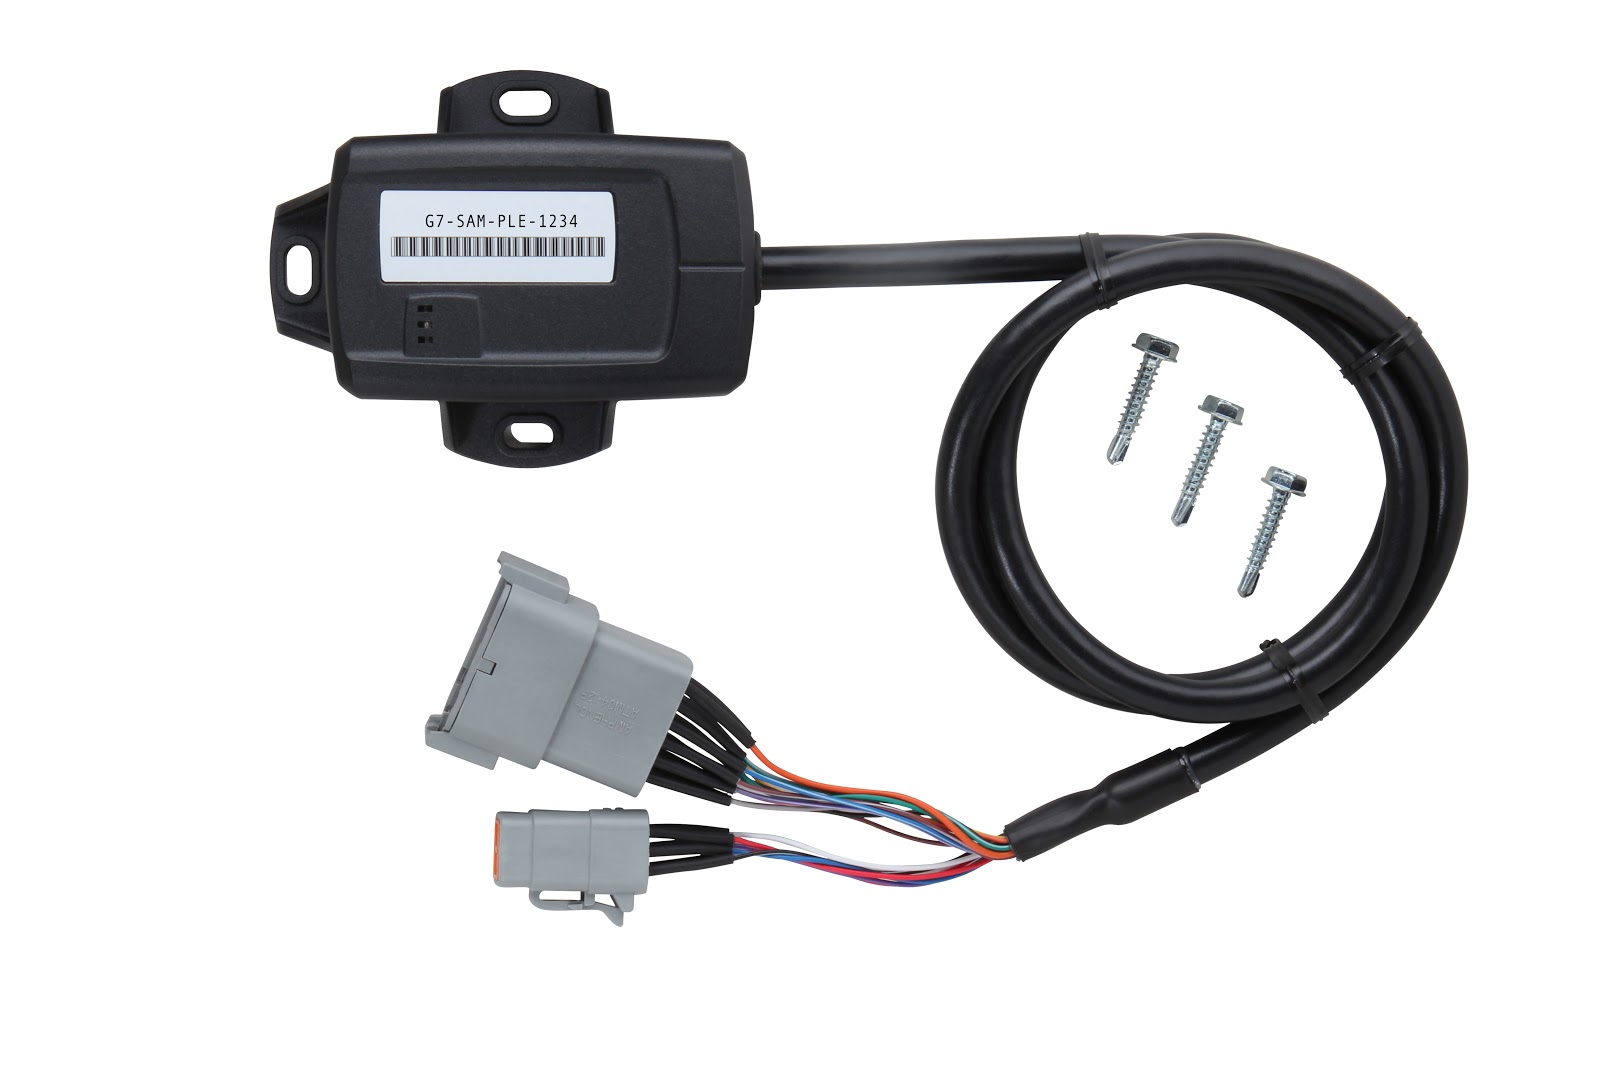
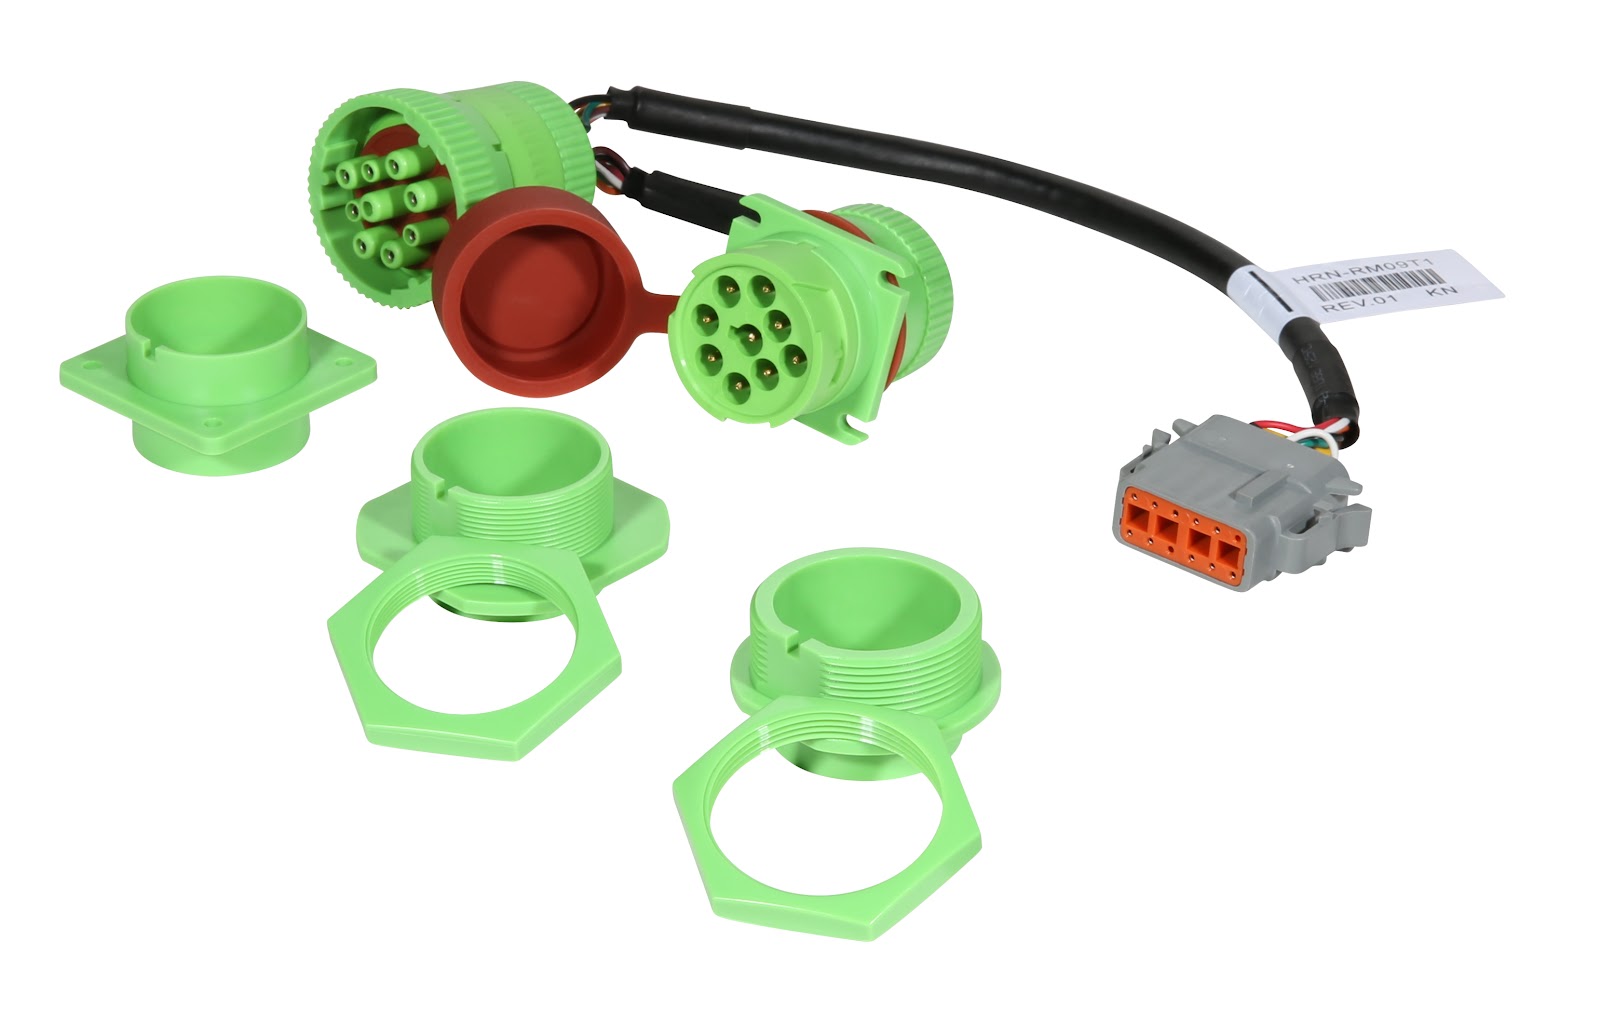
- HRN-GR09K1— Universal Rugged Heavy-Duty T-Harness Kit (IP67)
- HRN-RMRCA1 — Required for connecting to CAT vehicles (requires HRN-GR09K1)
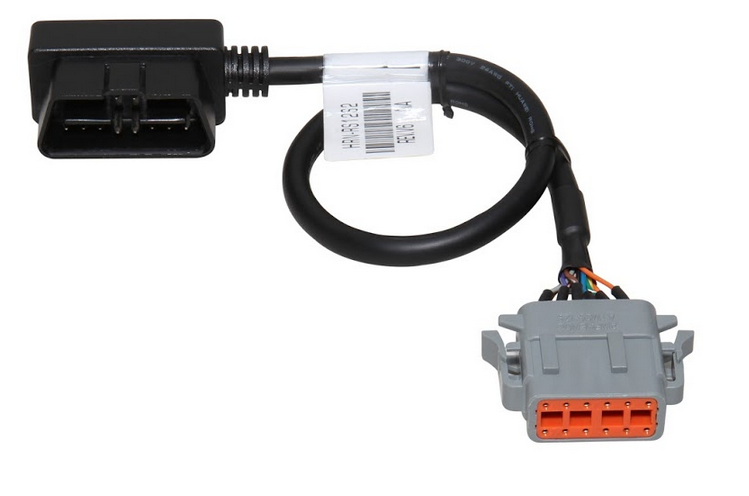
- HRN-RS12S2 — Required for connecting to the vehicle diagnostic port or to an existing harness.
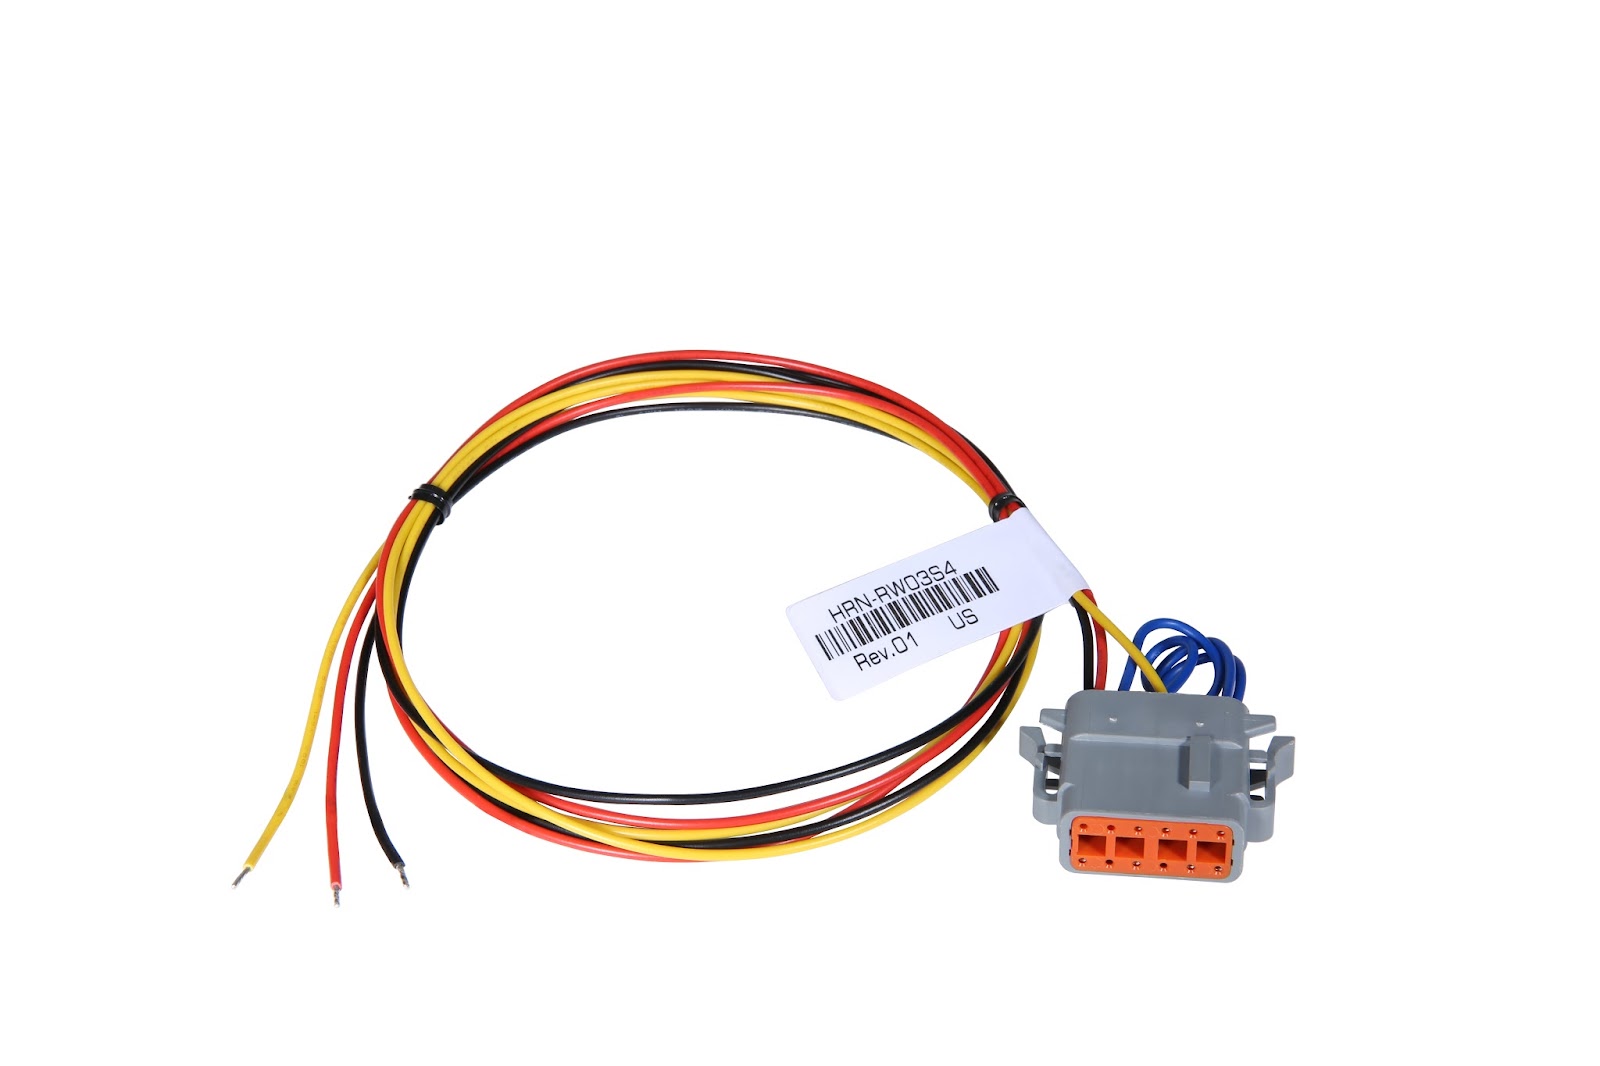
- HRN-RW03S4 — Required for connecting to an external power source
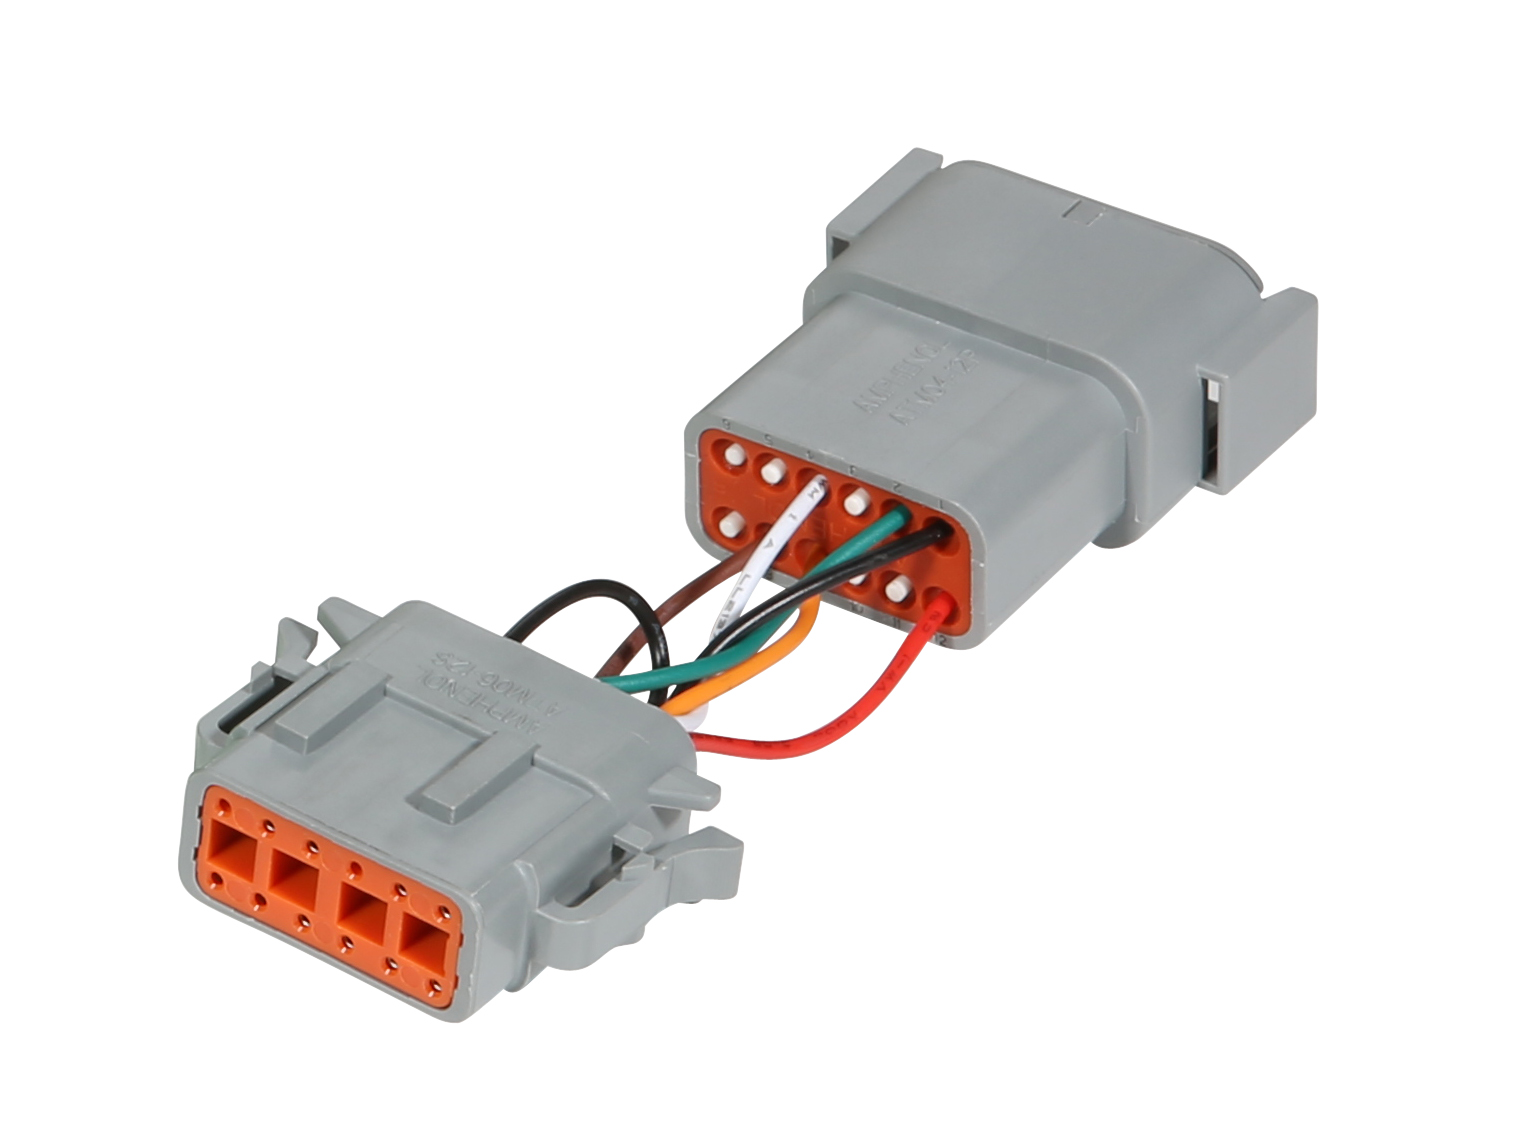
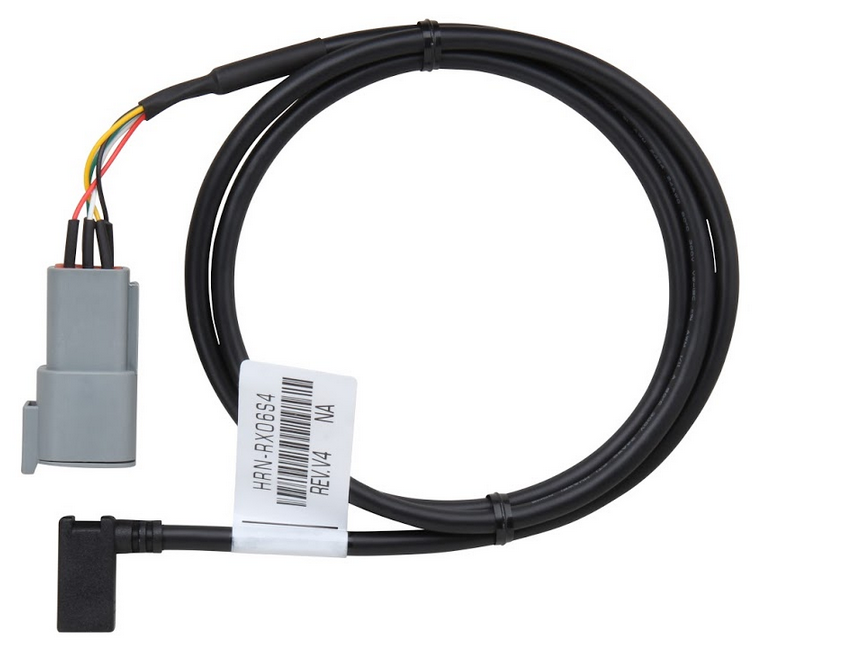
- HRN-RX06S4 — Required for connecting your GO7 RUGGED to any IOX.
Harness PIN diagram and description for ALDL and IOX
For professional installation where specific cable routing is required, the terminals on the weather-resistant connectors can be depinned on both the GO7 RUGGED and the corresponding HRN-RS12S2 and HRN-RX06S4 harnesses. This allows the installer to route the wires through a smaller opening. The wires can then be repinned into the connectors per the tables below. In this manner, the GO7 RUGGED can be installed in restricted spaces while maintaining its IP67 rating.
The GO7 RUGGED and its connectors are IP67-rated. The HRN-RX06S4 and HRN-RS12S2 are only IP67-rated in part, with the gray connectors being the only weatherproof elements. Removal of the gray connectors on either the GO7 RUGGED or its harnesses will reduce the overall weatherproofing of the system. Figure 1 illustrates the scope of the weatherproofing for the GO7 RUGGED and its harnesses.
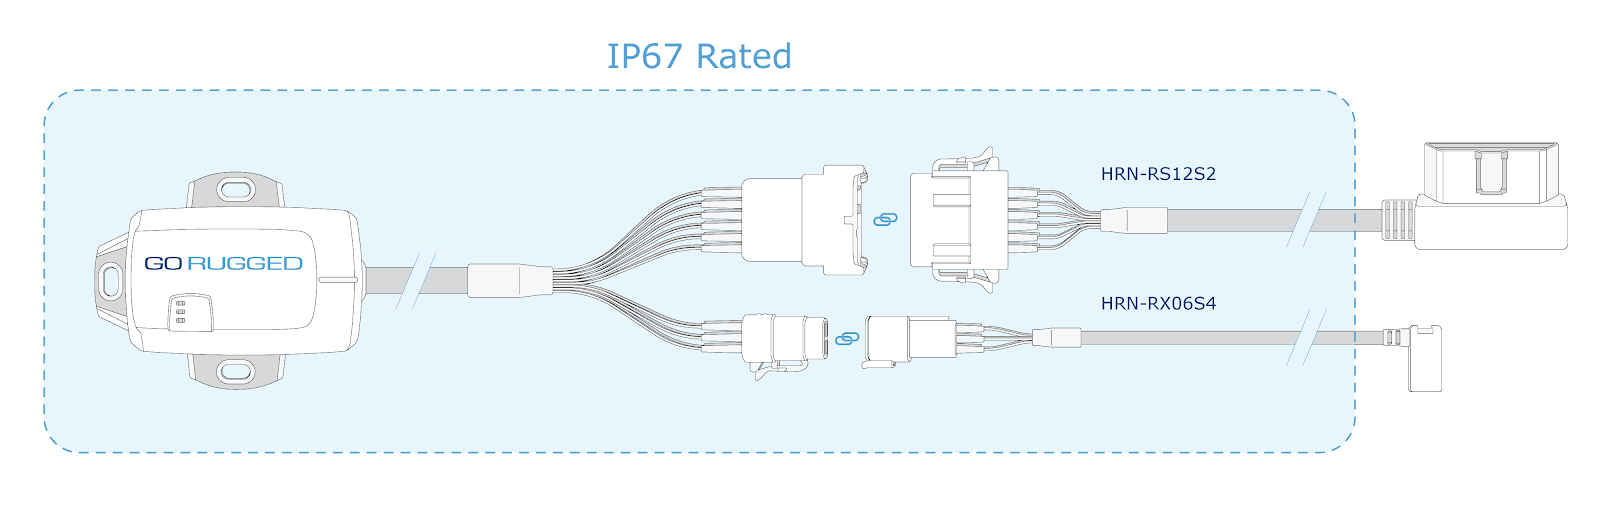
Figure 1: The blue region highlights the scope of the IP67 rating.
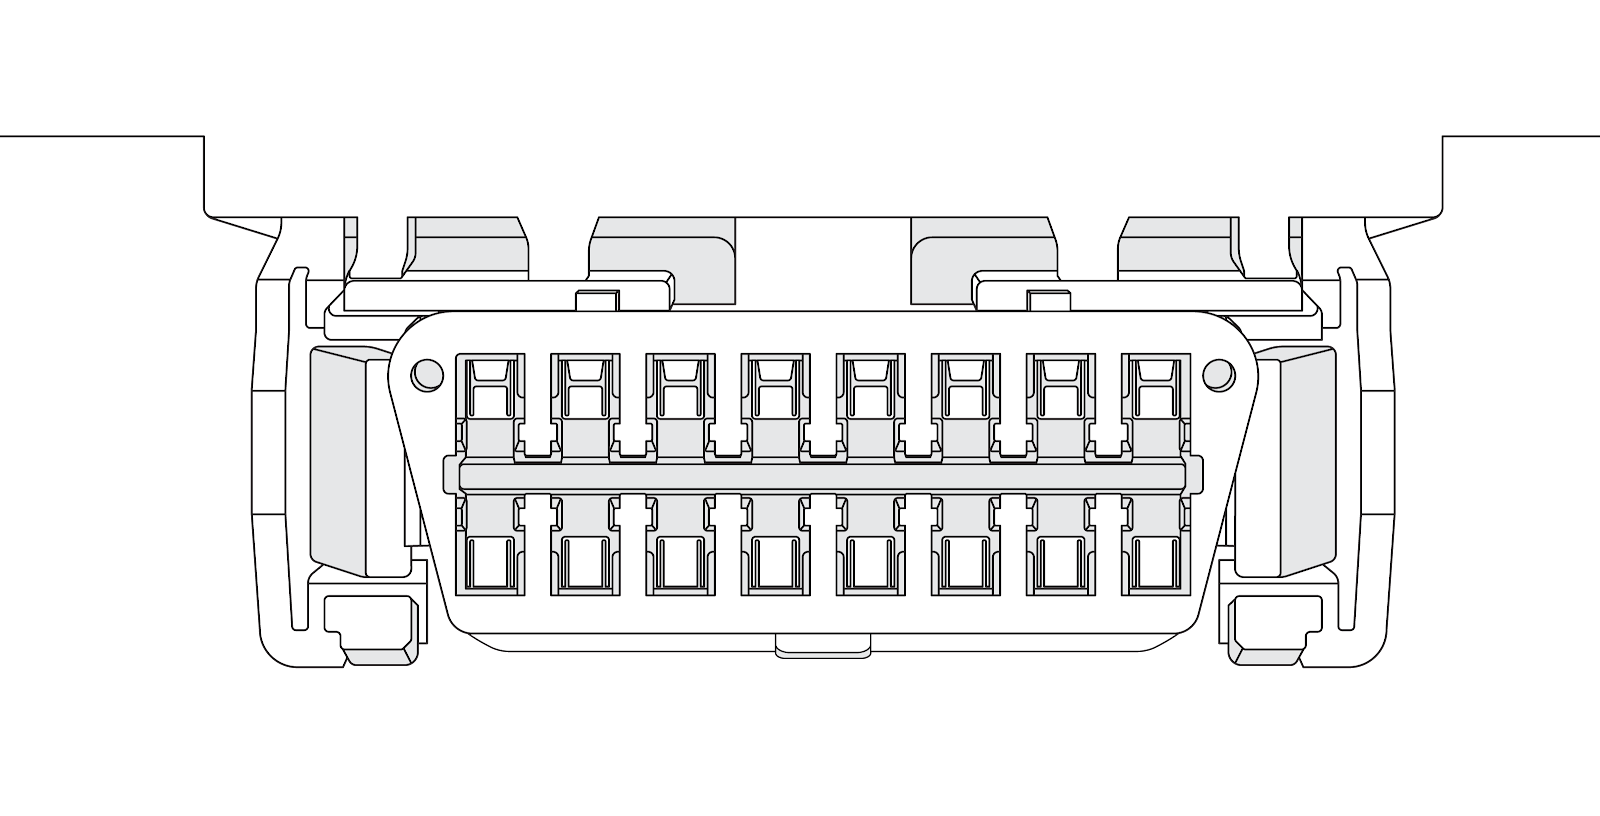
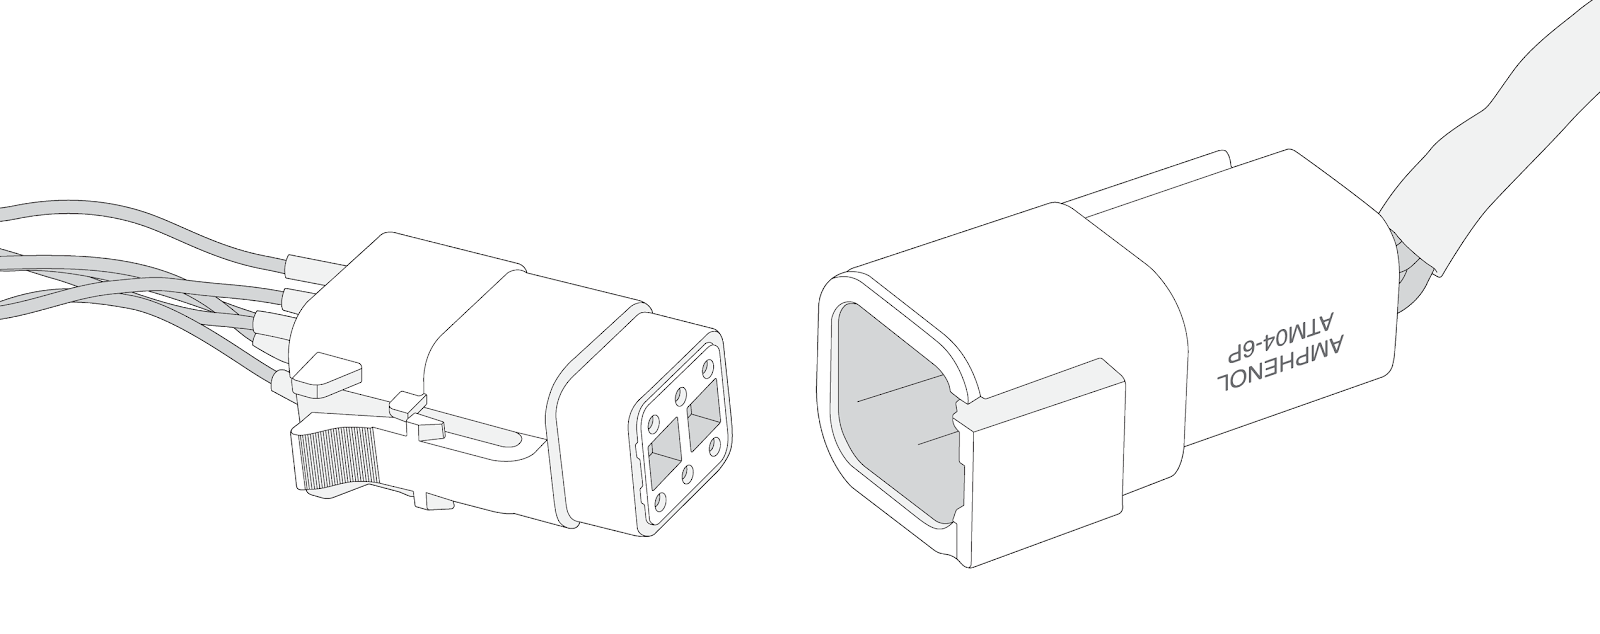
HRN-RS12S2/GO7 RUGGED — ALDL diagnostic port Cconnector
✱ NOTE: Not all pins are populated on all vehicles.
PIN | Wire color | Description for ALDL Port | PIN | Wire color | Description for ALDL Port | |
1 | Orange | Ground (Signal Shield) | 7 | Brown | Make/Model Specific | |
2 | Green/White | CAN Low | 8 | Pink | Make/Model Specific | |
3 | Blue/White | L Line | 9 | Black | J1850 (+) | |
4 | Brown/White | J1850 (−) | 10 | Green | K Line | |
5 | Purple/White | Make/Model Specific | 11 | Yellow | CAN High | |
6 | Gray | Make/Model Specific | 12 | Orange/White | Power (12 V/24 V) |
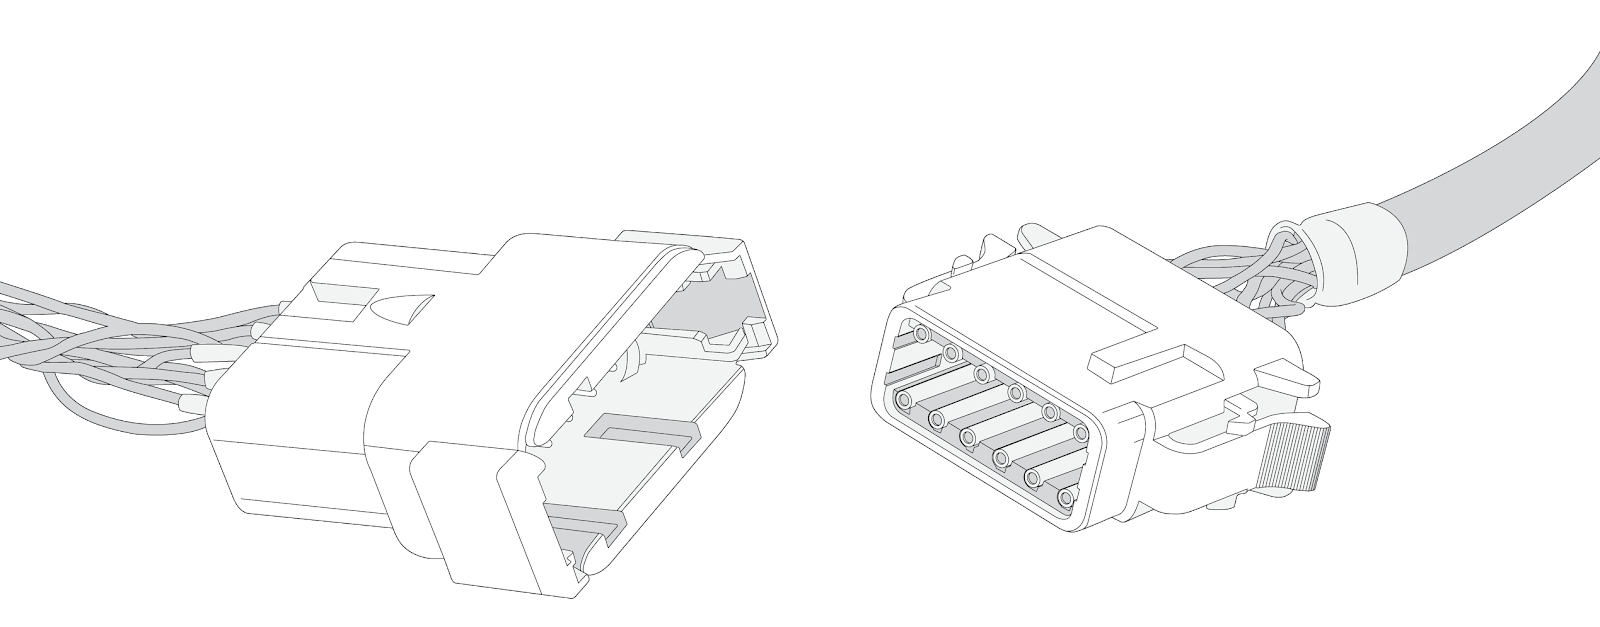
HRN-RX06S4 — IOX port connector
PIN | Wire color | Description | PIN | Wire color | Description | |
1 | Red | Power | 4 | Black | Ground | |
2 | White | CAN Low | 5 | Green | CAN High | |
3 | Yellow | Wake-up | 6 | Not Used | Not Used |
GO7 RUGGED — IOX port connector
PIN | Wire color | Description | PIN | Wire color | Description | |
1 | Black/White | Power | 4 | White | Ground | |
2 | Blue | CAN Low | 5 | Purple | CAN High | |
3 | Red | Wake-up | 6 | Red/White | Not Used |
Preparing for installation
Before installing your device, please document your device serial number. You will need this information at a later time to verify your installation.
- Verify that we support your vehicle by carefully reading the device release notes at goo.gl/fZURff or the vehicle specific installation notes at goo.gl/MCIXt0. If you have any questions or concerns please consult your Authorized Reseller.
- Ensure no dash warning lights are on in the vehicle while it is running, and all other functions such as headlamps and flashers etc. are working prior to installing the device.
Installation instructions
Professional Installation Required — Installation of the GO7 RUGGED requires that the installer have sufficient technical knowledge and expertise for mobile device installation and integration into modern vehicles, i.e. Certified Geotab Installer certification or equivalent.
Read important related safety information and limitations of use following these installation instructions. Read and follow all instructions and warnings to prevent serious injury and/or vehicle damage.
WARNING! Prior to GO7 RUGGED installation, read and follow important safety information including limitations of use located following these installation instructions. Always read and follow all safety information to prevent loss of vehicle control and serious injury.
WARNING! Do not attempt to install, re-configure or remove any product from a vehicle while the vehicle is in motion or otherwise in operation. All installation, configuration or removal must be done only in stationary vehicles which are securely parked. Attempting to service devices while the vehicle is in motion could result in malfunctions or accidents, leading to death or serious personal injury.
Installing the GO device
1 | Locate the vehicle’s engine diagnostic port, typically found in the driver’s area at or below knee level. Align the OBD connector on the HRN-RS12S2 (sold separately) with the vehicle diagnostic port and push in place. Note: Heavy-duty vehicles use a different connector system. Contact your Authorized Geotab Reseller for heavy-duty connector applications or for extension harnesses should it be necessary to place your device away from the engine diagnostic port. |
|
2 | Connect the 12-pin male connector on the device to the 12-pin female connector on the HRN-RS12S2 as shown and click into place. Ensure that all connections are secure. All three lights on the device will flash briefly. |
|
3 | If you are also installing an IOX, connect the 6-pin female connector on the device to the 6-pin male connector on the HRN-RX06S4 and click into place. Connect the female mini-USB connector on the other side of the HRN-RX06S4 to the male mini-USB connector on your IOX. Ensure that the two USB connectors are secured with a zip tie. |
|
4 | With the vehicle parked outdoors to locate satellites and vent exhaust fumes, start the vehicle and allow it to run for approximately 3 minutes. During this time period you will notice that the Red LED will power on and light up on the face of the device. Shortly afterwards, the Green and Blue LEDs will light up when the device connects to the cellular and GPS networks. This initial startup may take several minutes to complete. |
|
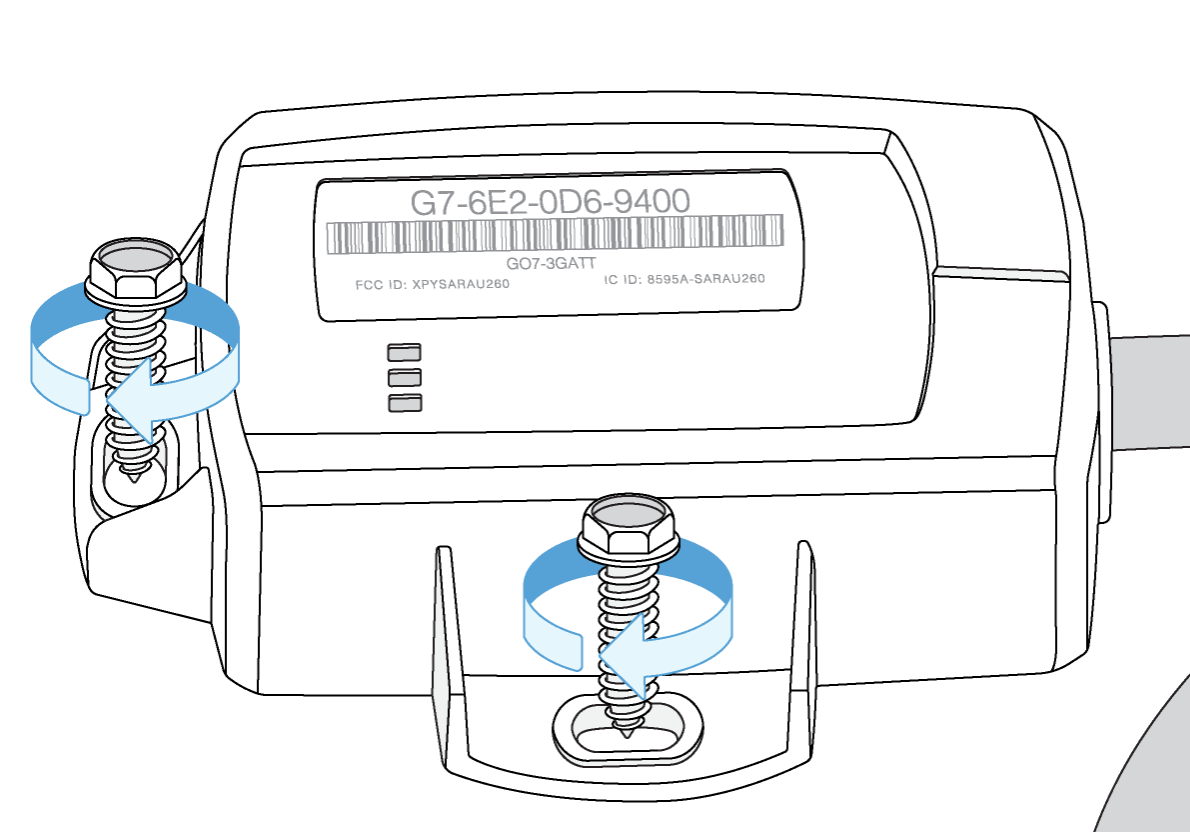
5 | Once all three LEDs have lit up, select a location to attach your device. Drill 5/32 inch pilot holes first then secure the device into place using the supplied Hex Washer head screws. Ensure that you install your device in a location where the wires will not interfere with the safe operation of the vehicle. | |
6 | The GPS antenna in a GO7 RUGGED is located on the same face as the device label. Make sure that the antenna is always pointing upwards towards the sky for faster GPS latch times. | |
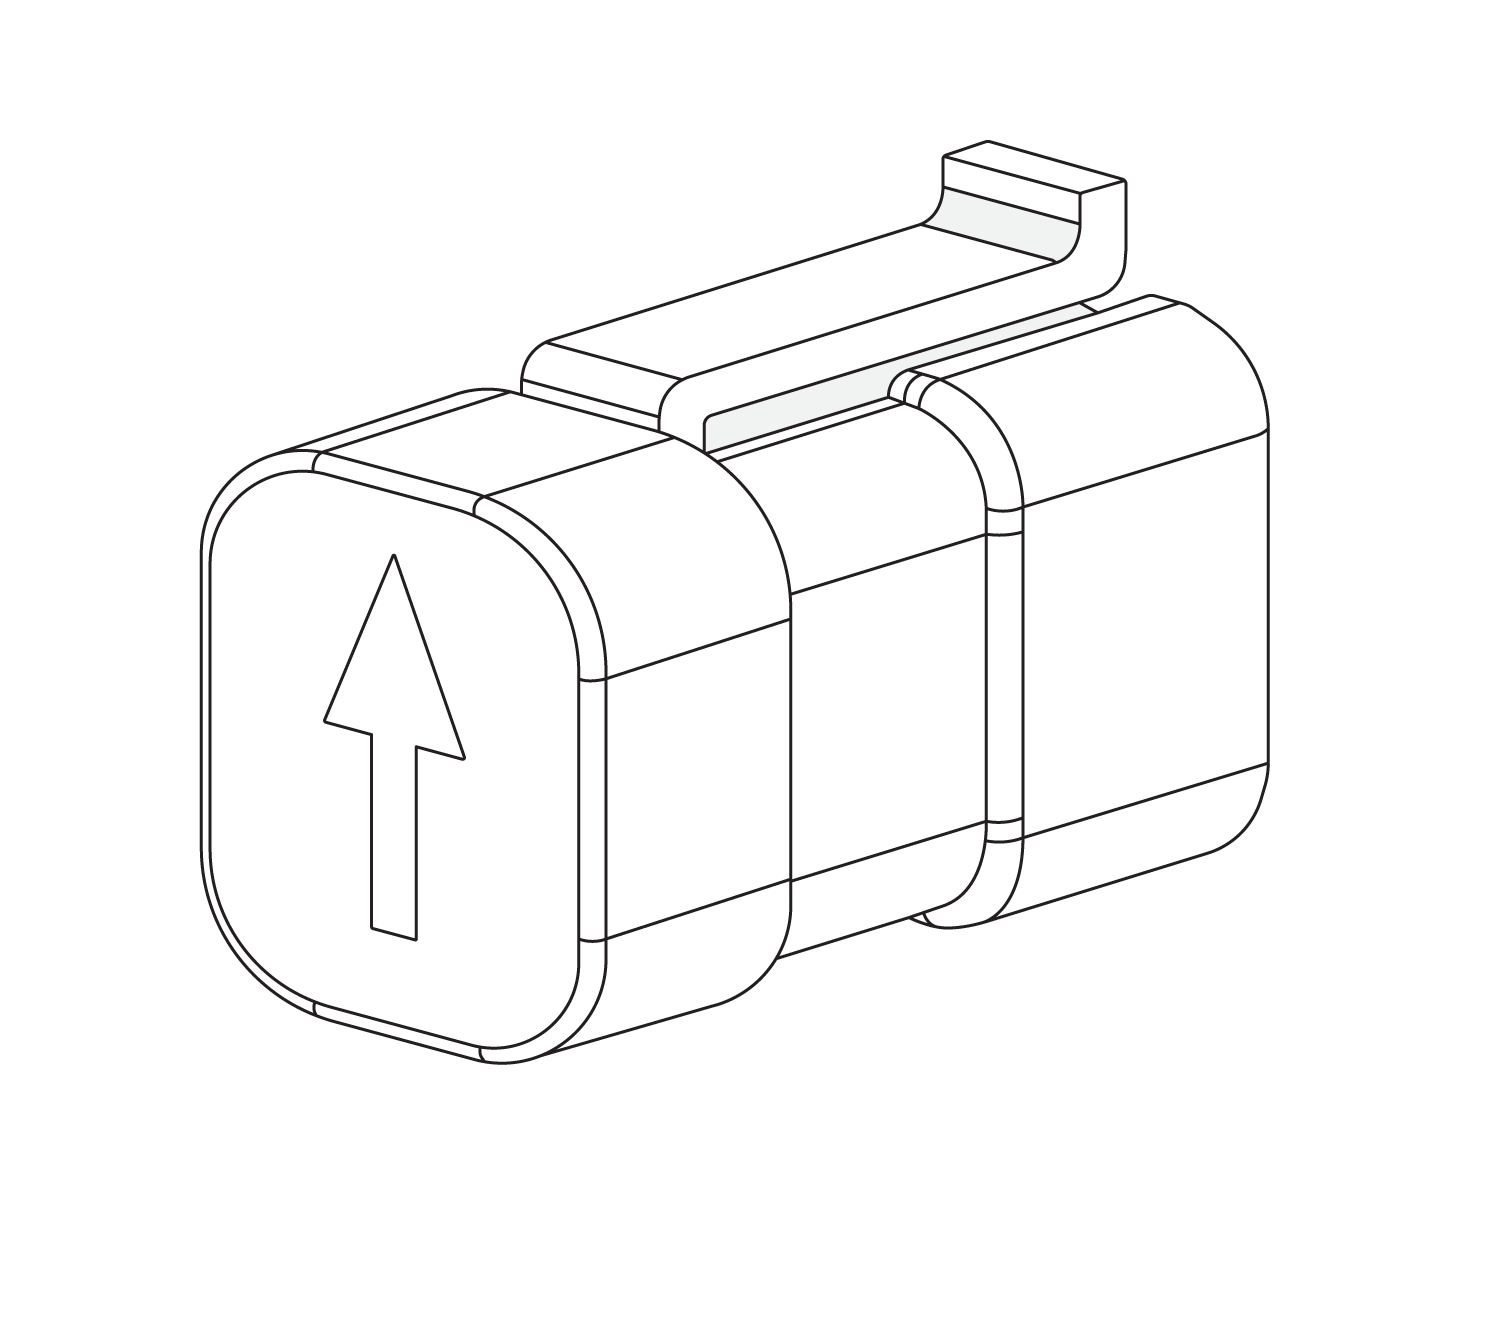
7 | The 6-pin weatherproof female connector of the telematics device comes covered with a sealing cap for waterproofing and dustproofing. Remove the cap only if you plan on using an IOX (requires HRN-RX06S4 adapter cable). Otherwise, keep the cap in place with the arrow facing towards the lock clip located at the top of the 6-pin female connector as shown. Attaching the sealing cap in any other orientation will not guarantee a waterproof and dustproof seal. |
|
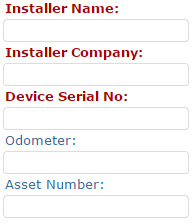
8 | Please verify that the device is communicating correctly. Using a PC or smart phone, navigate to installmygps.com. Fill in your name, company, and the Geotab GO7 RUGGED device serial number (found at the bottom of the device) and click on Log Install. |
|
9 | You will now see a screen that displays the current status of the device. If the device is communicating correctly, you will see GREEN lettering with the last valid GPS record. If the text appears in RED, the device is unable to communicate and you must verify the installation. |
WARNING! All in-vehicle devices and related cabling must be securely fastened and kept clear of all vehicle controls, including gas, brake and clutch pedals. This requires the use of a cable tie when securing the device or any extension harness to the OBD connector, securing both sides of the harness. If you do not use a cable tie, vibration in the vehicle can lead to a loose connection that could indirectly cause the vehicle’s engine computer to fail, loss of vehicle control, and cause serious injury. Inspect devices and cabling regularly to ensure that all devices and cabling continue to be securely attached.
WARNING! If at any point after an in-vehicle device is installed a warning lights up on the vehicle dash or the vehicle stalls or has a marked drop in performance, shut off the engine, remove the device, and contact your reseller. Continuing to operate a vehicle with these symptoms can cause loss of vehicle control and serious injury.
Important safety information and limitations of use
For the latest version of the Limitations of Use, please visit: goo.gl/k6Fp0w.
WARNING! Do not attempt to remove the devices from the vehicle in which they are originally installed for installation in another vehicle. Not all vehicles share compatibility, and doing so may result in unexpected interactions with your vehicle, including sudden loss of power or shutdown of the vehicle’s engine while in operation or cause your vehicle to operate poorly or erratically and cause serious injury and/or vehicle damage.
NOTICE: This product does not contain any user-serviceable parts. Configuration, servicing, and repairs must only be made by an Authorized Reseller or Installer. Unauthorized servicing of these products will void your product warranty.